
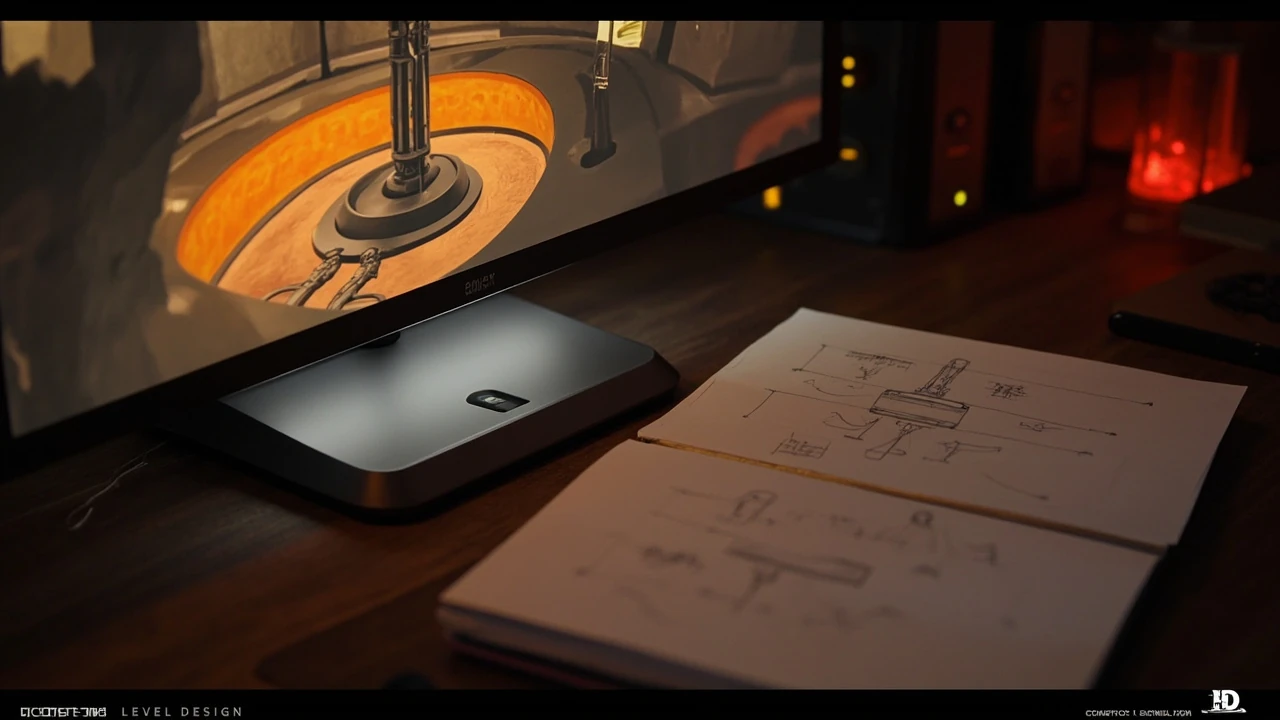
Mayachin Shrine in Tears of the Kingdom: what level designers can learn from a baseball bat puzzle
The Mayachin Shrine sits in plain view on the surface of Hyrule, just north of the Hyrule Field Skyview Tower in the Exchange Ruins, and it is consistently listed by players and walkthrough writers among the trickier puzzle rooms in The Legend of Zelda: Tears of the Kingdom. Its goal is unusually physical for a shrine: build a bat from environmental parts, use it to drive a rolling ball into a sequence of colored ground strips, and time a hit against a pair of large orange targets so the door and treasure chest open. The room looks like a small contraption, but it concentrates several design problems that matter far beyond Zelda: how a level communicates timing, how an environment teaches construction, how a single mechanism expresses multiple difficulty layers, and how the developer rewards mastery without punishing a first attempt. Studying the room from a designer’s perspective gives a clear case study in compact puzzle-room design, and it is the reason the Mayachin Shrine keeps appearing in retrospectives of the game’s best work.
This article treats the shrine as a design artifact rather than a player walkthrough. It breaks down the room’s layout, the player verbs it asks for, the way it teaches its own rules, the timing and feedback loops it relies on, and the lessons that transfer to original puzzle rooms in any engine. Where the discussion needs to point back to the room itself, it references the official Mayachin Shrine guide on IGN, which documents the bat assembly, the rotating platform, and the two orange targets that gate the exit and the treasure chest. The aim is to give developers, technical designers, and level-design students a structured reading of one shrine that they can apply to their own work, whether they are prototyping in Unity, building shrine-style content in Unreal, or designing compact puzzle encounters for a smaller scope.
Why the Mayachin Shrine is a useful case study
Shrines in Tears of the Kingdom are short, self-contained rooms that have to teach a single idea and resolve it inside a few minutes of play. The Mayachin Shrine is unusually dense: it asks the player to read the environment, assemble a tool, manage a moving platform, and time an impact against a rolling ball. Most shrines pick one of these verbs and make it the spine. The Mayachin Shrine combines three of them, and that combination is what makes it interesting from a design perspective.
For a developer or technical designer, the room is a small, legible example of several recurring questions. How do you signal that an object is interactable? How do you teach a timing puzzle without a wall of text? How do you make failure feel recoverable? How do you gate two rewards behind a single mechanic so the player feels the difference between them? The Mayachin Shrine answers each of these in a way that can be lifted into a design document or a postmortem. It is also a room that experienced players get wrong on the first try, which makes it useful for studying the cost of an unstated rule in puzzle design.
Finally, the shrine is interesting because it sits inside a much larger content system. Zelda: Tears of the Kingdom shipped with 152 shrines, and each one had to be authored, tested, and balanced against the others. Studying one room lets us see the constraints that a shrine author works under: a small footprint, a small prop budget, a single core idea, and a tight feedback loop. Most studios building similar self-contained content encounter the same constraints, whether the format is called a shrine, a dungeon room, a challenge room, a vault, or a daily puzzle.
Room layout and player verbs
The Mayachin Shrine unfolds along a single axis, with the entrance on one side and the exit on the other. The middle of the room is a rotating platform the player must cross to reach the central mechanism. Behind that mechanism, two large orange targets sit on the wall. The off-center idea is that the player is not simply navigating a corridor; they are entering a small machine and learning how to operate it.
The room asks for a small, well-defined set of verbs:
- Read the room: identify the spike, the octagon-shaped object, and the round poles as separate parts of a buildable tool.
- Cross a hazard: move across a rotating platform without falling, using the central ground pressure switch to stop the rotation.
- Operate a switch: use a weapon on the column to rotate the pivot that controls the ball.
- Assemble: combine a spike, the octagon-shaped object, and a pole to form a bat.
- Time an impact: hit the ball with the bat as it rolls over the colored ground strips so it strikes the orange target.
- Reset: reactivate the column switch to return the bat to a neutral position after a failed attempt.
For a designer, the most important thing on this list is not the bat. It is the order. The verbs arrive in roughly the order a designer would expect: explore, cross, learn, assemble, perform. The room rarely asks the player to do two of these at the same time, which keeps the cognitive load of each beat manageable. That sequencing is one of the room’s strongest design choices and a useful pattern to copy.
How the shrine teaches its own rules
A well-designed puzzle room teaches its rules through the environment. The Mayachin Shrine is unusually disciplined in this respect. The spike in the ground, the octagon-shaped object, and the round poles are not hidden behind a quest marker or a tutorial box. They are the only affordances on the floor, and their geometry already hints at how they fit together. A player who looks at the spike and the octagon-shaped object can imagine the spike pressing into the larger face. A player who then notices the round poles can imagine them attaching to the other end. The room is doing the teaching through shape and proximity.
The colored strips on the ground that the ball rolls across are the second teaching tool. They mark a distance and a speed, but they do not label that speed. The player has to read the ball as it rolls and notice that it passes the second-to-final strip at a consistent point on each pass. That observation is the timing window for the hit. Because the strips are visual, the timing lesson is also visual. There is no need for text, a meter, or a counter. The room uses the same channel it will use for the actual task, which is a strong principle for any timing puzzle.
The ground pressure switch under the rotating platform is the third teaching tool. Standing on it stops the rotation, which is the first concrete feedback the room gives: the player’s body affects the environment. That same feedback is then reused for the column switch, where a weapon hit rotates the pivot. Both switches are physically similar in feel, even though they control different things. The room links the two switches through action, not through labels, which keeps the teaching local and the verbs consistent.
Timing, feedback, and the reset loop
The puzzle is a timing puzzle with a reset loop, and that loop is where most of the design work is. The player hits the ball, often misses, and has to return to the column to reactivate the switch. The bat has to be repositioned. The platform has to be crossed again. The ball has to be re-released. None of these steps is punishing, and the room does not hide any of them behind a failure state. A failed hit does not close the door, does not spawn an enemy, and does not take away the bat. The cost of failure is time, not progress.
That choice is a deliberate one. A shrine that punished misses would force the player to think about resource loss. A shrine that allows free retries lets the player think about the timing. The Mayachin Shrine is on the free-retry side, which means the player’s attention stays on the mechanism, not on the stakes. The reset loop is also short. Returning to the column, hitting the switch, and re-positioning the bat takes a few seconds. That short loop is important because it keeps the player inside the timing window. A long reset would push the player out of the problem and force them to relearn the timing on every attempt.
The room also gives partial credit. The walkthrough notes that even getting the tip of the orange target opens the path out. That is a meaningful design choice. The exit target is more forgiving than the treasure target, and that ordering is the room’s way of telling the player which reward is the main one and which is the bonus. A player who clears only the exit target still gets a real outcome: the room resolves. A player who clears both gets the chest. This is the same principle used in combat design, where a fight can be won while individual actions still go wrong, and it is one of the cleanest examples of layered rewards in the game.
Affordance and the cost of an unstated rule
Most of the Mayachin Shrine is legible on a first read. The spike, the octagon-shaped object, the poles, the column switch, the ground switch, and the targets are all visible from the entrance. What is not visible is the timing rule. The colored strips are there, but the connection between the strips, the bat swing, and the orange target has to be inferred. A player who swings at the ball when it is over the wrong strip will miss every time, and the room does not tell them why.
This is the one place where the shrine leans on observation rather than instruction, and it is where first attempts most often fail. The room is asking the player to count strips, watch the ball, and time a hit to a strip that is not labeled. That is a real cost. It is also a deliberate one. The Mayachin Shrine is positioned as a harder room inside a system of 152 shrines, and the difficulty is exactly this kind of unstated timing rule. A designer studying the room has to ask whether that cost is worth the payoff. For a one-off shrine in a large open-world game, the answer is usually yes. For a smaller, more linear game, the same unstated rule could feel like an unfair surprise.
The mitigation is the reset loop. Because the cost of a miss is small and the reset is short, the player can experiment. A player who misses twice usually starts to read the strips as a sequence and figures out the window by the third or fourth attempt. The room is not teaching through language; it is teaching through iteration. That works in Zelda because the player has time, the room is contained, and the surrounding world does not depend on the player solving the puzzle in any particular way. None of those conditions are automatic in other games, and a designer who copies the Mayachin Shrine’s timing rule has to bring those same conditions with them.
Designing the bat: assembly as puzzle
The bat is the room’s signature mechanic, and the assembly sequence is itself a small puzzle. The player removes the spike from the ground, presses it into the octagon-shaped side of the object, and attaches one of the round poles to the other end. The walkthrough notes that the bat can be built in different ways, and two of those ways are described in detail. The point is not which combination is correct. The point is that the assembly is part of the timing puzzle: a bat that is too short will not reach the target, a bat that is too long will be hard to control, and a bat that is misaligned will hit the ball off-axis.
For a designer, this is a useful lesson in how to embed a build step inside a timing puzzle. Most timing puzzles start with a tool already in the player’s hands. The Mayachin Shrine asks the player to make the tool first, and the act of making it primes the player to think about reach and angle. The assembly is short, but it changes the player’s mental model of the room from “hit the ball” to “shape the tool that hits the ball.” That subtle shift is the difference between a timing puzzle and a construction puzzle with a timing gate, and it is what gives the room its layered feel.
The assembly also has a hidden benefit: it slows the player down. A player who has just built the bat is more likely to be careful with it than a player who was handed a bat at the start of the room. The shrine uses the assembly as a calm-down beat before the timing section. Designers often talk about “settling beats” between action sections, and a short build step is a common way to provide one without breaking the flow of the room.
Reading the room as a single-machine composition
One way to analyze the Mayachin Shrine is to treat the entire room as a single machine with a few parts: an input (the player), a switch (the column), a pivot (the rotating platform and the ball track), and two outputs (the exit door and the treasure chest). The machine has two states, idle and active, and the player’s job is to move it from idle to active in the right order. The first orange target is the main output, the second is the bonus output. The bat is the player’s tool for interacting with the machine, and the colored strips are the machine’s visible timing signal.
Framing the room this way is useful because it makes the design constraints visible. The room has to communicate the state of the machine to the player at all times, and it does this through the ball, the strip colors, and the targets. If the developer removed the colored strips, the room would still be a machine, but the player would not be able to read its state. If the developer removed the targets, the machine would have no visible output. If the developer removed the bat, the player would have no way to interact with the machine. The Mayachin Shrine is small enough that every part of it is doing visible work, and that visibility is the most copyable aspect of the design.
For a studio building similar rooms, the practical lesson is to design the machine first and the visuals second. Decide what the player has to do, what the player has to read, and what the player has to feel. Then dress the room so that every prop is doing one of those three jobs. The Mayachin Shrine follows that rule almost perfectly. The spike, the octagon-shaped object, and the pole are assembly props that also teach reach. The column is a switch that also teaches control. The targets are outputs that also communicate the room’s reward structure. Nothing in the room is decorative.
Lessons for compact puzzle-room design in any engine
The Mayachin Shrine is a useful reference for any team building self-contained puzzle rooms. The patterns below are not specific to Zelda; they show up in roguelike challenge rooms, in mobile puzzle games, in co-op dungeon content, and in any project where a small room has to teach a single idea and resolve it cleanly.
| Design choice in the Mayachin Shrine | What it teaches the player | How to reuse it in another project |
|---|---|---|
| Affordances from shape, not labels | Spike, octagon, and pole suggest how they fit | Use silhouette and proportion so the player can read the assembly from the floor plan |
| Colored strips as a timing signal | Visible distance and speed without text or a meter | Mark a path with color, lighting, or decals so the player can see the timing window |
| Short reset loop after a miss | Failure is recoverable and the cost is time, not progress | Keep reset steps under a few seconds so the player stays in the timing window |
| Layered reward through two targets | Main output is more forgiving than the bonus | Use one forgiving reward for completion and one tighter reward for mastery |
| Build step as a calm-down beat | Assembly primes the player to think about reach and angle | Insert a short construction step before any precision or timing section |
| Single-axis room layout | The room reads in one pass and resolves in one pass | Limit puzzle rooms to one or two sightlines so the player can plan the whole room from the door |
Each row is a pattern that the Mayachin Shrine uses deliberately, and each one is portable. The trick is to copy the pattern, not the art. A team working in a different art direction, a different genre, or a different engine can use the same logic and arrive at a very different room that still feels just as legible.
What the shrine is not good at
Honest design analysis has to include the failure modes, and the Mayachin Shrine has a few. The biggest one is the unstated timing rule. The room does not tell the player to wait for the second-to-final strip, and a player who is not counting strips will not know why their hits miss. For a player who is not used to timing puzzles, that gap is a real friction point. The room handles it with a forgiving reset loop, but a team copying the design should ask whether their audience will use the reset loop the way Zelda players do.
The second limitation is the visual signal of the two orange targets. Both targets are visually similar, which means the player has to learn by trying that one is the exit and the other is the chest. A more explicit cue, such as a different color, a different size, or a different surrounding decoration, would communicate the same information with less trial and error. The current design keeps the targets clean, but it pushes the cost of reading the room onto the player. That is a real trade-off, and it is worth weighing in any project where the audience is more casual or has less time per room.
The third limitation is the assembly ambiguity. The walkthrough notes that the bat can be built in different ways and that two specific builds are described. The implication is that some builds work better than others, but the room does not tell the player which is which. A player who builds a bat that is too short or has the wrong angle will not know why their timing feels off. Again, the room handles this with iteration, but iteration is only a satisfying answer when the loop is short and the cost of failure is small. The Mayachin Shrine meets both conditions, but not every room will.
Adapting the design to a smaller project
A team working on a smaller scope, such as a mobile puzzle game, a roguelike challenge room, or a level for a game jam, can lift most of the Mayachin Shrine’s structure without copying the Zelda art direction. The shortest version of the design fits in a single room with three props, one switch, and two outputs. The player assembles a tool from two or three visible parts, uses the tool to hit a moving object, and tries to reach one or two targets. The room resolves in under a minute, and the reset loop is a single button press.
For a mobile audience, the most important adjustment is the unstated timing rule. Mobile players typically have less patience for an unstated timing window, especially in a level that the player expects to clear in a single attempt. The simplest fix is to add a soft visual cue at the timing window, such as a brief flash on the strip, a small color change on the target, or a short audio stinger. That kind of cue keeps the timing puzzle intact while removing the gap that frustrates less experienced players. It is a small change, but it converts the room from a “figure it out” puzzle to a “watch the signal” puzzle, which is the right register for a casual mobile game.
For a more serious PC or console audience, the Mayachin Shrine’s design can be used almost as is, with one important caveat. The room relies on the player being willing to read the environment, count strips, and try a hit several times. That willingness is a function of trust. Players will iterate when they trust the room, and they will not iterate when they do not. Trust is built by consistent feedback, short reset loops, and a clear payoff for the first successful hit. The Mayachin Shrine builds that trust in a few seconds. Any project that wants to copy the design has to invest in the same trust-building work.
Production constraints when authoring a room like this
Authoring a room like the Mayachin Shrine at production scale involves several practical decisions that the room’s design hides. The first is the prop budget. The room uses a small number of distinct meshes, but each mesh is doing more than one job. The octagon-shaped object is both the spike receiver and the bat body. The pole is both a structural prop and a bat handle. The spike is both a hazard and a component. A team that treats these props as separate art tasks will spend more time and end up with a room that feels less coherent.
The second decision is the trigger setup. The room has at least three triggers: the ground pressure switch that stops the rotating platform, the column switch that rotates the pivot, and the orange targets that gate the exit and the chest. Each trigger has to be tuned for forgiveness. The ground switch has to feel weighty without feeling sticky. The column switch has to register a hit at a wide range of weapon lengths. The orange targets have to register a hit at the tip as well as the center. Each of those tolerances is a small design decision, and each one is a place where the room can feel unfair if it is tuned too tight.
The third decision is the audio mix. The Mayachin Shrine is a quiet room, and the sounds of the rotating platform, the ball rolling, the column switch, and the bat impact are the main feedback channel for the player’s actions. Audio is doing the same job as the colored strips: it tells the player when an action has succeeded and when it has failed. A team that treats audio as polish will get the polish but not the function. Audio has to be designed alongside the timing puzzle, not after it, or the timing puzzle will feel muted and the player will lose the feedback loop that the design depends on.
Comparing the Mayachin Shrine to a generic timing puzzle
A useful way to read the Mayachin Shrine is to compare it to a generic timing puzzle. The table below lines the two up against the same design questions. The generic column is the baseline you would expect in a competent but unremarkable timing room. The Mayachin column is the specific choices the shrine makes.
| Design question | Generic timing puzzle | Mayachin Shrine approach |
|---|---|---|
| How is the timing window taught? | Text prompt, on-screen meter, or visible counter | Colored strips on the ground, read visually and learned by iteration |
| What is the player’s tool? | Handed to the player at the start of the room | Assembled inside the room from environmental parts |
| What does the player hit? | A static or simple moving target | A rolling ball whose speed is set by the room’s mechanism |
| How is failure handled? | Reset to the start of the room, sometimes with a penalty | Short reset to the column, no penalty, free retries |
| How is reward layered? | Single completion reward at the end of the room | Two targets: a forgiving exit reward and a tighter chest reward |
| How is the room laid out? | Multi-section or branching layout | Single-axis layout with two visible outputs |
| How is the room taught? | Tutorial overlay, prompt chain, or NPC guide | Affordances from shape, color, and proximity |
The comparison makes the design decisions concrete. The shrine does not rely on any one trick. It relies on a small set of consistent choices that reinforce each other. The colored strips teach the timing. The assembly teaches the tool. The targets teach the reward. The reset loop teaches that failure is safe. Each piece is doing one job, and the jobs line up.
Reusable checklist for a Mayachin-style room
For a designer who wants to build a similar room, the list below is a starting checklist. It is derived from the choices the Mayachin Shrine actually makes, not from generic puzzle design advice. Use it to pressure-test a prototype before it goes to a wider playtest.
- Can the player see the entire room from the entrance, or at least the two main outputs?
- Is every prop doing at least one of three jobs: assembly, switch, or output?
- Is the timing signal visible from the player’s position when they take the timing action?
- Does the player have to assemble the tool before they use it, even if the assembly is short?
- Is the reset loop short enough that the player can stay inside the timing window across attempts?
- Is the main output more forgiving than the bonus output, so the room resolves even on a partial success?
- Does the audio give a distinct cue for hit, miss, and reset?
- Is the room free of decorative props that do not do any of the three jobs?
- Can a first-time player who reads the environment figure out the assembly without a tutorial overlay?
- Does the room teach at least one new verb in a way the player can reuse in a later room?
Each of these is a question the Mayachin Shrine answers “yes” to. A room that answers “yes” to the same list is likely to feel coherent in the same way. A room that answers “no” to several of them is likely to feel muddled, and the fix is usually to remove props or to merge two props into one.
What the Mayachin Shrine teaches about shrine design as a system
Inside Tears of the Kingdom, the Mayachin Shrine is one entry in a system of 152 shrines. The system is the real design achievement, not any single room. Each shrine has to be short, self-contained, and teachable. Each shrine has to reward completion. Each shrine has to fit inside a content budget that the development team can hit. The Mayachin Shrine is a useful case study because it shows what a high-density shrine looks like, and it shows what a system of 152 such rooms costs.
The density of the Mayachin Shrine is unusually high. Most shrines pick a single verb and make it the spine. The Mayachin Shrine combines assembly, navigation, and timing in a single room, and it does so without losing the room’s legibility. That density is what makes the room feel hard, and it is also what makes the room memorable. A system of 152 shrines can support a small number of high-density rooms as long as the surrounding rooms are simpler. The Mayachin Shrine is the upper end of the difficulty curve for a reason: it is the room that a player who has cleared dozens of simpler shrines will eventually meet, and the room is tuned for that player.
For a studio building a similar system, the practical lesson is to budget for a range of difficulty, not a single level. Some rooms should be one-verb, low-density, and forgiving. Some rooms should be two- or three-verb, higher-density, and tighter. The Mayachin Shrine is the second kind, and it is the room that gives the system its ceiling. Without a room like it, the system would feel flat. With too many rooms like it, the system would feel exhausting. The art of shrine design is the balance between the two, and the Mayachin Shrine is the upper bound of the art in Tears of the Kingdom.
Why this room is worth studying beyond Zelda
For a developer or technical designer, the Mayachin Shrine is a useful reference because it is small, legible, and dense. It fits on a single screen. It uses a small number of props. It teaches a single timing idea. It has a clear reward structure. It has a forgiving reset loop. It has a build step that primes the player for the timing section. Every one of those choices is portable to other projects, and every one of them is documented well enough in the official walkthrough that a designer can map the room to their own content pipeline.
The room is also useful because it is honest about its costs. The unstated timing rule, the visual similarity of the two targets, and the assembly ambiguity are all real friction points, and the room handles them with iteration rather than instruction. That is a defensible choice in a single-player open-world game with a long tail of shrines, and it is a less defensible choice in a faster-paced or more casual project. Studying the room is therefore a way to study the trade-off, not just the payoff.
The walkthrough on IGN remains the most direct way to verify the room’s layout, the bat assembly, and the two orange targets, and it is the primary reference for any designer who wants to map the room to their own project. Reading that page alongside a design document is usually enough to start a prototype, and a short playtest in front of a small audience is usually enough to see whether the same design works in a different context.
Frequently asked questions
Where is the Mayachin Shrine located in Tears of the Kingdom?
The Mayachin Shrine is on the surface in plain sight, just north of the Hyrule Field Skyview Tower in the Exchange Ruins, south and west of Lookout Landing. The official IGN guide for the Mayachin Shrine describes the exact position and the surrounding landmarks, and it is the most reliable reference for the entrance.
What is the main puzzle in the Mayachin Shrine?
The main puzzle is a timing puzzle built around a rolling ball. The player has to build a bat from a spike, an octagon-shaped object, and a pole, and then hit the ball as it rolls over the colored strips on the ground so it strikes the large orange target on the wall. Hitting the orange target opens the path out, and hitting a second target opens the path to the treasure chest. The same puzzle is described in the official walkthrough of the Mayachin Shrine on IGN.
How do you build the bat in the Mayachin Shrine?
Remove the spike from the ground, press it into the large octagon-shaped side of the object sticking out of the ground, and attach one of the round poles to the other end. The walkthrough notes that the bat can be built in different ways and that two specific builds are described as the ones that work best. The assembly is short, and it primes the player to think about reach and angle before the timing section.
What does the orange switch in the Mayachin Shrine do?
The column switch rotates the pivot below the platform that the large ball is rolling past. Hitting the column with a weapon turns the pivot and returns the bat to a neutral position, which is what the player uses to reset between attempts. The switch is also the room’s primary control point: every reset begins with a hit on the column.
How many times do you need to hit the orange target?
There are two orange targets. Hitting the first one opens the path out of the shrine, and hitting the second one opens the path to the treasure chest. The walkthrough notes that even getting the tip of the first target is enough to open the exit, which is the room’s way of saying that the main output is more forgiving than the bonus output.
Is the Mayachin Shrine one of the harder shrines in the game?
Yes, it is consistently described as one of the harder shrines in The Legend of Zelda: Tears of the Kingdom. The difficulty is not the assembly, which is short, but the timing rule, which is unstated and has to be learned by reading the colored strips and watching the ball. The room compensates with a short reset loop and a forgiving main target, but the timing window is tighter than in most other shrines.
Can the Mayachin Shrine be cleared in a single attempt?
A player who reads the colored strips and counts them on the first pass can clear the room in a single attempt, but most players need two or three attempts to find the timing window. The room is designed for that kind of iteration: the reset is short, the cost of a miss is small, and the bat is not consumed. A patient player can clear the room on the first visit without any external guide.
What kind of design pattern does the Mayachin Shrine represent?
The Mayachin Shrine is a compact example of a high-density puzzle room: assembly, navigation, and timing in a single space, with two layered outputs and a short reset loop. The pattern is portable. Any team building self-contained puzzle content can use the same five elements: a buildable tool, a moving target, a visible timing signal, two outputs of different difficulty, and a reset that takes a few seconds.
What is the most important lesson from the Mayachin Shrine for other games?
The most important lesson is that the timing signal and the timing action should use the same visual channel. The Mayachin Shrine uses the colored strips on the ground to teach the timing and the same ground as the surface the player stands on. That choice keeps the teaching local and the player’s attention focused. Any timing puzzle benefits from the same choice.
Where can a designer find a reliable reference for the Mayachin Shrine’s layout?
The IGN walkthrough of the Mayachin Shrine is the most direct reference for the room’s layout, the bat assembly, and the two orange targets. The same page documents the rotating platform, the column switch, and the colored strips, and it is the starting point for any designer who wants to map the room to their own project. Designers should treat that page as a layout reference, not as a script to copy.





Leave a Reply