
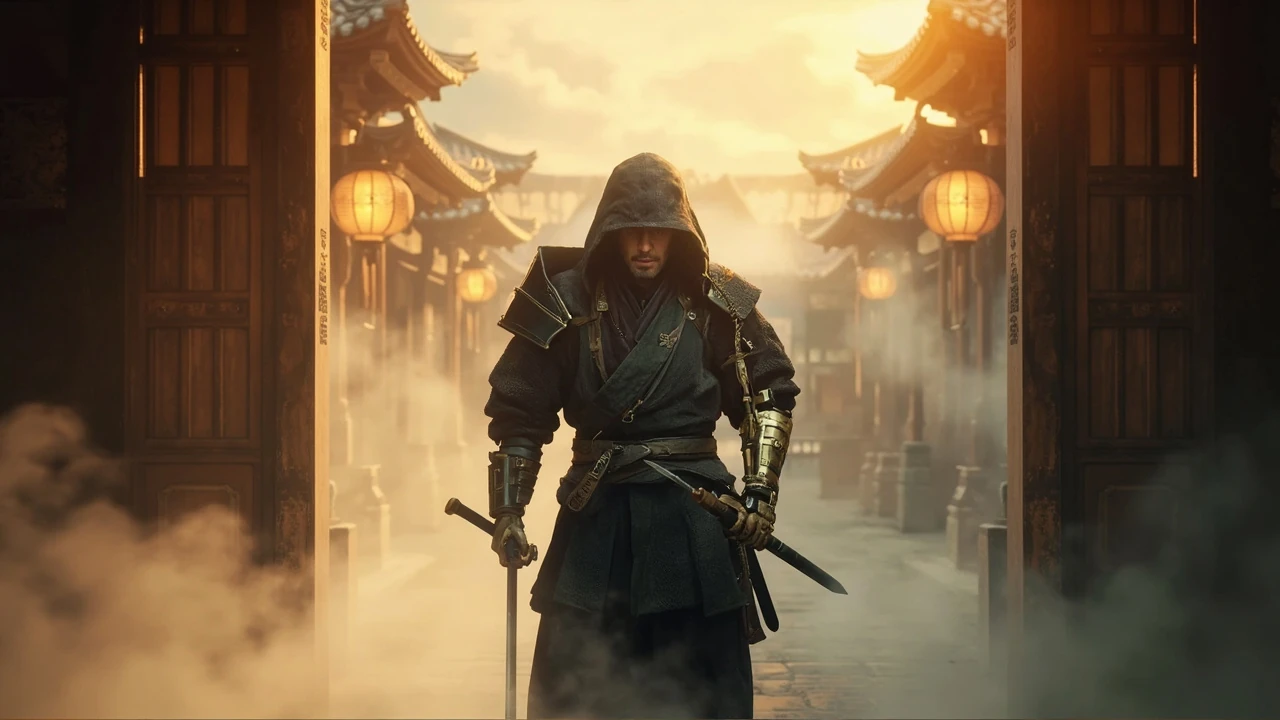
Sekiro walkthrough: how to read this guide and the game at the same time
Sekiro: Shadows Die Twice is a 2019 action-adventure game developed by FromSoftware, set in a fictionalized Sengoku-era Japan and built around stealth, posture-based sword combat, and a tightly scripted roster of boss encounters. For players, the phrase “sekiro walkthrough” usually means “I am stuck and need a way forward.” For developers and technical artists reading the same query, the same encounter is a study in encounter pacing, animation commitment, audio design, and risk readability. This guide serves both audiences by treating the game as something to be completed and as something to be learned from, with a clear separation between player advice and production commentary.
Rather than pretending the game is short, this walkthrough respects how FromSoftware structures progression. The first act teaches the deflection system. The midgame tests your ability to manage posture, healing resources, and boss phases. The late game punishes players who have not internalized the difference between health and posture damage. Every chapter below pairs a player goal with the underlying design decision it depends on, so a reader who finishes the game understands both how they won and why the fight felt the way it did.
Use the chapter list as a navigation aid, not a required path. Players who want a straight answer to a specific boss can jump to the matching section. Developers and designers who want to extract reusable patterns should read the What designers can take from this encounter callouts that close each major section. The Frequently asked questions at the end addresses the most common sticking points that drive players to search for help in the first place.
Core systems you must understand before any boss
Every sekiro walkthrough assumes the player has internalized three systems. Without them, even a correct strategy will collapse on contact with a fast multi-phase boss. These are the deflection loop, the posture and health split, and the death/rezze mechanics that change the risk curve during long fights.
Deflection, dodges, and the posture meter
Sword clashes in Sekiro are resolved through a posture system rather than pure health damage. Each successful deflection adds posture damage to the enemy, and once a posture bar fills, the enemy becomes open to a deathblow. The core loop is therefore not “hit until dead” but “build posture, then cash in.” Dodging is intentionally weaker than in many action games; it exists to create spacing, not as a primary defense. A walkthrough that focuses on dodging is usually teaching a defensive style that works against a few early bosses but breaks against later multi-attack combos where deflection is the only reliable answer.
From a production standpoint, the deflection system is a deliberate narrowing of player options. By making the sword the strongest defensive tool, FromSoftware forces every encounter into a readable rhythm of attack, deflect, reposition, punish. Designers studying the game can note how the camera, lock-on, and animation cancel windows were tuned to keep that rhythm readable without simplifying the movesets.
Health, posture, healing, and the deathblow economy
Health and posture are tracked separately. A boss with low health and high posture can still one-shot the player with a single late-phase combo. Healing is limited by a gourd system: each use consumes a healing resource that can be restored by killing enemies, but the resource only recovers a set number of charges per rest. Deathblows are the only way to permanently reduce a boss’s health pool; chip damage from sword strikes outside of posture windows is minor and rarely a viable path on its own.
This split is what makes a sekiro walkthrough feel like a resource puzzle rather than a damage race. The player is not asked to do more damage; they are asked to convert posture advantage into deathblows while keeping their own posture and health viable. Encounter design in other action games often copies the surface of this loop without the underlying economy, and the result is a combat system that feels less tense.
Death, resurrection, and Dragonrot
Sekiro’s signature risk lever is the resurrection mechanic. The player can revive once per death at the spot where they fell, and the revived state is the only chance to land a stealth deathblow or recover from a near-loss. Resurrection is not a free heal: it is a strategic reset that uses a unique resource and triggers Dragonrot, a status that affects NPCs and, in some quest paths, can lock out endings.
A walkthrough that ignores the Dragonrot side effect will eventually trap a player in a quest they cannot complete. The resource management question is not “do I have a res?” but “do I have a res, and am I willing to accept the narrative cost of using it here?” That question is also the cleanest example of FromSoftware merging combat economy and world state into a single decision, and it is a pattern worth studying for any action RPG that wants its mechanics to feel like story.
Builds, skills, and the skill tree in practical use
Sekiro has fewer build choices than a typical Souls game, but those choices still matter. A walkthrough should treat the skill tree as a finite budget: every point spent on a flashy skill is a point not spent on the fundamentals that make the deflection loop work. For most players, the practical order is prosthetic skills first, then combat arts that complement the upcoming boss, then a small number of latent abilities once the core loop is reliable.
Combat arts that earn their slot
Combat arts are special moves that cost spirit emblems, a finite resource restored at Sculptor idols or by killing enemies. Not every combat art is worth its emblem cost in a long fight. The high-value arts are the ones that either build posture, create a damage window, or solve a specific boss pattern. A whirling blade art that looks spectacular may be useless against a boss with a sweep attack, while a slower thrust art can stagger that same boss and open a deathblow.
From a design perspective, combat arts are the game’s answer to build diversity without stat variance. Each art is a small encounter-specific tool, and the player is implicitly choosing which encounters they want a tool for. Walking through the game, the developers expected players to swap arts between bosses rather than lock in a single build, and a good walkthrough makes that explicit.
Prosthetic tools and their encounter roles
The prosthetic arm is the most distinctive build layer in the game. It is a slot-based tool that can be upgraded with special materials, and each tool has a clear role against specific enemy archetypes. Fire tools stagger beasts and burning enemies. The loaded spear counters shielded enemies. The shuriken interrupts flying enemies. The flame vent softens shieldless heavies. Treating the prosthetic as a single “best upgrade” is a common mistake; the correct read is that it is a small set of answers to common encounter problems, and the player should think about which answer is needed in the next region.
Skill point economy
Skill points are finite and gated by XP earned from kills and boss defeats. The most efficient first purchases tend to be the deflect timing windows, the aerial combat skills needed for certain mini-bosses, and one or two stealth skills that make scouting runs safer. Speccing into an end-game skill tree before the mid-game is mostly wasted because many of the late nodes depend on combat arts or prosthetic unlocks the player does not yet have.
Early game progression: Ashina Outskirts, Hirata Estate, and the first lessons
The first region of a sekiro walkthrough is short but dense. The game is teaching the deflection loop, the stealth kill, and the deathblow economy all at once, and most players who “get stuck” in the first hour are failing one of those three lessons rather than the boss itself.
Ashina Outskirts and the general mini-boss
Ashina Outskirts is a short path that ends in a fight with a chained ogre, the first true mini-boss. The encounter teaches two lessons at once: fire and prosthetic tools stagger large enemies, and the player cannot brute-force a posture-based fight by spamming attacks. The reliable path is to apply the flame vent prosthetic to fill the posture bar, deflect the ogre’s slow follow-ups, and land a deathblow when the bar fills. Players who try to heal through the ogre’s grabs run out of healing resources; players who try to dodge its slow swings lose posture and get grabbed anyway.
The encounter also introduces a soft resource: the limited spirit emblems for the prosthetic fire. Burning them on the ogre is correct, because the next prosthetic tool is a more emblem-efficient answer to a different enemy type later. A walkthrough that recommends saving every emblem is teaching the wrong economy.
Hirata Estate and the tutorial’s stealth test
Hirata Estate is a flashback region that doubles as a stealth tutorial. The recommended approach is to use grappling points, line-of-sight breaks, and stealth deathblows to thin the patrol before engaging the boss, Lady Butterfly. The walkthrough is straightforward if the player accepts that stealth is the intended path: skipping it costs more healing and more posture than a slow clear.
Lady Butterfly herself tests the same deflection loop as the ogre, but with two phases. Phase one is a fair sword duel with a few illusion clones. Phase two adds a spirit owl companion that punishes players who try to chase damage instead of restoring posture. The fight is a checkpoint for the player’s understanding: if Lady Butterfly feels impossible, the deflection timing is not yet internalized, and the next region will be harder, not easier.
Mid game: Ashina Castle, the memory bosses, and the path to the Guardian Ape
The mid game is where most players feel that they need a sekiro walkthrough the most. The boss roster is longer, the multi-phase mechanics start to appear, and the choice between two major branches becomes a real decision rather than a scripted path. A good walkthrough gives the player a stable order of operations and flags the points where their personal build choices matter.
Ashina Castle and the gate defence
Ashina Castle reintroduces several returning NPCs and adds a short defense sequence that doubles as a stealth and crowd-control test. The walkthrough here is mostly about patience: clear the rooftops, save the NPCs whose survival affects later quest lines, and avoid the open courtyards until the patrol pattern is known. The boss at the end of the sequence, Gyoubu Oniwa, is a mounted spear specialist whose charge attack punishes hesitation.
Gyoubu is a useful diagnostic. Players who can deflect his charges and pull him off the horse with the grappling hook will usually clear him on a second or third attempt. Players who try to run around the arena and chip his health are the ones who get stuck, because the mounted posture build only resolves through deflection. From a design perspective, Gyoubu is a teaching encounter for “your deflection is the offense, not the defense.”
Senpou Temple, the monkeys, and the Guardian Ape
Senpou Temple shifts the game from feudal combat to something stranger, with longer platforming sections, ritual areas, and the first true multi-phase boss: the Guardian Ape. The encounter is famous for two reasons. First, it has a second phase that begins with a headless deathblow animation and ends with the ape screaming, an explicit narrative beat. Second, its terror scream attack in phase two forces the player to learn the mikiri counter, a precise dodge-forward that punishes thrust attacks.
A sekiro walkthrough for the Guardian Ape is mostly about recognizing when the second phase starts and switching to mikiri for the scream. Players who keep deflecting instead of mikiri-ing the scream will get one-shot, and the game is intentionally punishing that mistake. The lesson is that the same input (forward dodge) is the answer to a very different prompt (thrust attacks) than the player’s existing reflex is ready for. Designers can read the encounter as a deliberate forced adaptation, and players can read it as a clear signal that the game expects them to learn one new tool per region.
Memory bosses and the demon of hatred
Memory bosses are optional rematches against the player’s previous opponents in a small, flat arena. They are the best place to practice deflect timings without dying to terrain. The Demon of Hatred, a late optional boss, is the closest thing the game has to a Dark Souls style endurance fight: it has multiple phases, a long posture build, and a fire-leak attack that demands the player learn its timing. Walkthrough advice for the Demon is to treat each phase as a separate encounter, with separate healing budgets, rather than one long resource pool.
Late game and the four required endings
The late game of a sekiro walkthrough is unusual because the final boss is the same for most players, but the path there and the ending cinematics depend on quest choices that are easy to miss. The two most common walkthrough queries in the late game are “how do I get the good ending?” and “why is this boss impossible?” Both are usually answered by a missing item or a missed NPC interaction earlier in the game.
Corrupted Monk, Isshin Ashina, and the Sword Saint
Corrupted Monk appears in multiple forms: a warning encounter in a wedding cave, a true monk in a flooded sanctuary, and a memory of the monk in the final boss arena. The sanctuary fight is the one that ends the mid game, and it is a clear test of posture management against an opponent that punishes greed. The final boss, Isshin Ashina, is a four-phase duel that closes the main quest and is widely considered one of the most complete sword-fight encounters in the action genre.
Isshin is a useful walkthrough endpoint because his phases are designed to test everything the player has learned: the first phase is a fair sword duel, the second adds lightning reversal, the third adds a spear combo that requires the player to manage distance, and the fourth is a high-tempo phase where posture mistakes end the fight. A walkthrough that breaks the fight into four separate resource budgets and four separate learning tasks will usually carry a player who is mechanically capable but rhythmically inconsistent.
How the four endings diverge
The four endings of Sekiro are tied to two quest lines: the Kuro / Immortal Cord path and the Owl / Corrupted path. Players who ignored the Divine Child of Rejuvenation or the Frozen Tears item will lock themselves out of the purification ending. Players who chose the obvious “side with Owl” dialogue option early will end up on the Shura path. A walkthrough should not assume the player remembers which dialogue choices they made in a 30-hour playthrough; it should offer a short, explicit checklist of the two or three decision points that matter.
Boss strategy reference table
The table below summarizes the practical opening for each major boss, the highest-leverage tool, and the one mistake that most often traps first-time players. Use it as a quick reference when returning to a fight after a long break, not as a substitute for the full strategy section above.
| Boss | Best opening move | High-leverage tool | Most common mistake |
|---|---|---|---|
| Chained Ogre | Flame vent, then deflect follow-ups | Flame prosthetic | Spamming attacks instead of deflecting |
| Lady Butterfly | Stealth thin the arena, then deflect | Snap seed or shuriken for illusions | Chasing phase-two illusions |
| Gyoubu Oniwa | Deflect the charges, grapple the rider | Grappling hook timing | Chipping the horse from range |
| Guardian Ape | Mikiri the terror scream in phase two | Mikiri counter | Deflecting the scream instead of mikiri-ing it |
| Corrupted Monk (sanctuary) | Deflect combos, punish with a single thrust art | Ceremonial tanto or snap seed on terror | Healing too early after a posture break |
| Great Shinobi Owl | Deflect first phase, heal through firecrackers | Snap seed against owl fire | Letting the owl summon the spirit owl unpunished |
| True Corrupted Monk | Deflect in the arena, mikiri thrust mixups | Mikiri counter | Wasting spirit emblems on shuriken |
| Isshin Ashina | Deflect, then lightning reversal in phase two | Sakura dance to bait combos | Entering phase three without a full heal |
Common progression traps and how to unstick yourself
Even with a solid walkthrough, most players will hit a moment where the game stops making sense. The list below is the set of failure modes that show up most often in player questions, paired with the most reliable diagnostic and the cheapest fix.
- Boss does not stagger: the posture bar is low because the player is attacking between deflects instead of pressing deflect only. Reduce offense to two hits per window and let the posture bar fill on its own.
- Healing keeps failing: the healing resource is empty because the player is using the gourd at low health instead of full health. Heal at the first safe window, not after a hit.
- Boss is one-shotting: a posture break in a multi-phase fight is not visible until the next attack lands. If health is above half and a single hit kills, the posture bar was the problem, not the health pool.
- Prosthetic does not work: the wrong tool is equipped for the enemy archetype. Switch to a tool that matches the boss’s weakness, not the one with the highest upgrade level.
- Quest is locked: a required NPC is dead because Dragonrot was triggered too early, or the player skipped a dialogue option earlier in the region. Reload the last Sculptor idol and recheck NPC states before continuing.
- Stuck on a platforming section: the grappling point indicator is subtle, and many late-game hooks are off the camera center. Pan the camera until the indicator brightens before committing to a jump.
What designers and developers can take from Sekiro
For a studio audience, a sekiro walkthrough is also a postmortem of the game’s design choices. The list below maps the player-facing systems above to production decisions a developer can reuse, adapt, or deliberately avoid.
- Posture as a second resource: treating posture as a parallel meter to health created encounters that reward reading over grinding, at the cost of clarity for players who expect health-only combat. Document the resource split early when adopting it.
- Single best defensive input: making deflection the strongest defense is more readable than a layered dodge / parry / block system, but it raises the skill floor. Plan tutorials that gate progression on a single core input rather than a menu of options.
- Tool slots instead of stat builds: the prosthetic arm’s slot model lets the player carry encounter-specific answers without breaking balance. Consider a slot-based system for any game that wants build diversity without stat bloat.
- Risk cost tied to world state: tying the resurrection mechanic to Dragonrot and NPC fate is a clean way to make a combat resource a narrative cost. It does require strict inventory of which NPCs can be affected and when.
- Boss phase as a forced learning beat: every major boss introduces one new input requirement in its later phase. Plan encounter design around that rhythm rather than scaling the same moveset upward.
- Quiet audio as a readability tool: the music swells in phase changes are as much a player aid as a mood device. Plan audio mix passes for boss phase transitions, not just cinematics.
Production notes: how the combat system was built
Sekiro’s combat is built on an animation-driven lock-on system with deterministic input windows. From a technical standpoint, the deflection check is a small, fixed window after the player’s guard input where a successful enemy swing resolves as a parry rather than a block. Building this cleanly required the animation team to author attack animations with known, consistent swing frames rather than freeform motion-capture, and the posture system to track per-frame state across both combatants in the same authority.
Multiplayer, save, and online state are deliberately minimal: the game ships without real-time multiplayer and uses a simple save model keyed to the Sculptor idol checkpoints. For a studio adopting similar systems, the practical lesson is that the combat simulation benefits from running in a single authority with strict input buffering. Trying to offload posture or animation evaluation to a worker thread tends to introduce desync, especially during multi-phase transitions where the boss’s animation tree changes mid-fight.
For audio designers, the fight mix is built around a small library of swing, deflect, and impact cues that change with posture state. The same sword swing has a “soft” impact during early fight and a “sharp” impact when the boss is near a posture break, and that micro-mix is what gives the late fight its cinematic pressure. The system is small enough to fit a per-boss cue list and large enough to avoid obvious repetition across the encounter.
How a sekiro walkthrough should be read alongside an actual playthrough
The fastest way to use a walkthrough is not to read it in advance, but to read it after a failed attempt. The diagnostic order is the same one the game implicitly teaches: identify the phase, identify the prompt, identify the correct response. If the phase is unclear, the player is probably in a transition that the walkthrough can name. If the prompt is unclear, the camera or audio cue is the issue, and the walkthrough can suggest a fix like adjusting lock-on distance. If the response is unclear, the walkthrough is the right place to learn the new input.
For developers, the same loop works as a debugging heuristic: if the encounter is failing, the diagnosis order is system, prompt, response. Most combat bugs in similar games live in the prompt layer, where the player is not being told what the system expects of them. A walkthrough that names the prompt explicitly is closer to a useful QA artifact than a list of “tips.”
Comparison with similar action games at a high level
Sekiro sits between the more stat-driven Souls games and the more combo-driven character action games. The table below contrasts the three styles at the level of design intent, not as a recommendation. A studio picking a model should know which trade-off each entry represents.
| Style | Core combat verb | Player growth | Typical failure mode |
|---|---|---|---|
| Souls-style action RPG | Dodge, block, or shield | Stats and gear | Encounters turn into stat checks |
| Sekiro-style posture action | Deflect and posture break | Skill and reading | Encounters turn into reflex tests |
| Character action (DMC / Bayonetta) | Combo strings and dodge offset | Move list mastery | Encounters turn into rote execution |
Frequently asked questions
What is the best starting point in a sekiro walkthrough for new players?
The best starting point is the deflection tutorial in the first hour. New players who try to dodge the early ogre encounter instead of deflecting it usually lock in the wrong reflex for the rest of the game. Spend the first attempts practicing the timing window against a single enemy rather than chasing the boss kill. Once the deflection timing is reliable, the rest of the early game becomes much shorter.
How do I get the “good” ending without missing a quest?
The purification ending requires the Divine Child of Rejuvenation quest line to be completed and the Frozen Tears item to be given to Kuro at the correct point in the story. The Shura ending is triggered by choosing to side with Owl in the critical flashback. The standard “severance” ending is reached by following Kuro’s default request without the alternative. The Immortal Severance ending requires the full Divine Child quest plus the final dialogue choice with Kuro.
Why does my boss fight reset after the deathblow animation?
Most multi-phase bosses trigger a cutscene or a posture break that looks like the end of the fight but is actually the start of a new phase. The reliable cue is the music swell: if the music changed but the boss’s posture bar is not visibly broken, the player is in a transition. Defend through the transition animation instead of healing, because most phase transitions include a guaranteed unblockable attack that will punish a heal.
Is the grappling hook only for traversal, or does it have a combat use?
It has both. The grappling hook is the only reliable way to pull Gyoubu off his horse, and it is the standard answer to several mid-game mini-bosses that retreat to a vertical position. Treat the hook as a combat tool that costs no resource but consumes an animation window, not as a free movement option.
What should I spend sen on first?
Buy the deflection timing window upgrades and the mikiri counter skill first, in that order. The deflection window is the single most cost-effective skill in the game because it applies to every encounter. Mikiri is a smaller purchase that opens up the Guardian Ape and several late-game bosses. Cosmetic items and most prosthetic upgrades should wait until the mid-game is stable.
How do I stop running out of healing resources?
Heal at the first safe window, not at low health. Most players heal reactively after a hit lands, which means they spend healing charges on the same posture break that triggered the hit. Healing proactively after a deflect chain keeps the posture bar low and the resource pool stable. If you still run dry, the issue is the boss’s posture window, not the gourd: you are not landing enough deathblows.
Can I beat the game without the prosthetic tools?
Technically yes, but the game is designed around specific prosthetic answers to specific enemy archetypes. Skipping the flame vent on the ogre, the loaded spear on shielded enemies, or the snap seed on spirit summons will force the player into longer, more resource-heavy fights. The prosthetic is not a crutch; it is the game’s build system, and a no-prosthetic run is closer to a challenge run than a default playthrough.
Why does Dragonrot lock me out of a quest?
Dragonrot is the narrative cost of the resurrection mechanic, and several NPCs become unavailable for dialogue while they are afflicted. Most of the time the lock is temporary, and the cure is given by the Divine Child of Rejuvenation later in the game. The exception is the Owl / Corrupted ending path, where the lock is intentional and the player must accept the cost. If a quest is locked, the fastest check is whether the affected NPC’s quest line was already complete before Dragonrot was triggered.
Is the Demon of Hatred required to finish the game?
No. The Demon of Hatred is an optional boss at the end of a long side path, and it is not on the route to any ending. It is worth fighting for the lore and the combat challenge, but skipping it does not lock the player out of any ending or quest reward. A sekiro walkthrough that lists it as required is usually written by a player who treats it as the game’s hardest fight, not as a story gate.
Where can I read more about the game and the studio that made it?
For verified background on the game’s release, design intent, and combat system, the most reliable starting point is the dedicated English encyclopedia entry on the title, which summarizes its 2019 release, the Sengoku-era setting, and the posture-based combat loop that distinguishes it from FromSoftware’s earlier work. Developers interested in the studio’s broader catalog can cross-reference other FromSoftware releases and director interviews for context, but the encyclopedia entry is the cleanest primary summary of the game’s public facts.
Final notes on using this sekiro walkthrough
The walkthrough above is built so that the player side and the production side reinforce each other. The boss strategy table is short on purpose: it names the prompt, the response, and the common mistake, which is what a stuck player actually needs. The system sections are longer because the system is the part most walkthroughs skim, and it is the part that the game itself spends the first act teaching. If a reader is here only to clear a specific boss, the table will get them there. If a reader is here to understand why the game plays the way it does, the system and production sections will explain the design choice behind the prompt.
For studio readers, the most portable lesson from the game is not a specific mechanic but the rhythm of teaching one new input per region. That rhythm is what makes a sekiro walkthrough useful at all: the game teaches enough per region that the player can read the walkthrough for the next region without losing momentum. That pacing, more than any single tool or stat, is the part worth borrowing in a new action project.
Leave a Reply