
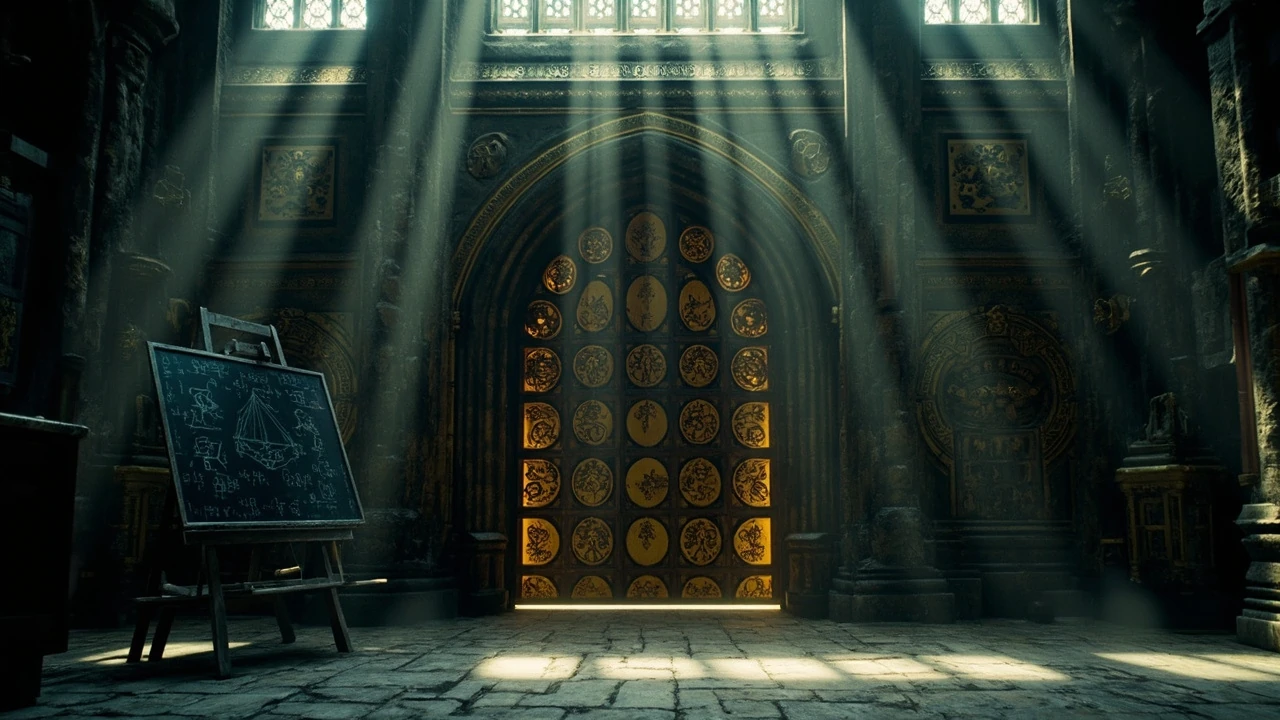
A locked stone door in Hogwarts Legacy rarely opens by itself. The game links every door puzzle to a specific logic: arrange two moving halves, mirror a sequence of animal symbols, trace a directional pattern, or survive a combat trial. Each mechanic teaches a different rule about how the wizarding world reacts to magic, and each one can block progress for an hour if the rule is missed. The fastest path through any of them is understanding the underlying symbol system before lighting the first torch.
This guide breaks down every door puzzle the game uses, what the symbols mean, which rooms contain which variant, and the order of steps that works on the first attempt. It also covers the failure cases most players hit, such as misreading the directional arrows on arithmetic doors or trying to brute-force the symbol lock with the wrong animal. Where a puzzle behaves differently in a specific location, the guide calls out the difference.
Hogwarts Legacy door puzzle: how every symbol lock works
The Hogwarts Legacy door puzzle family is a small set of mechanics built around two ideas: identify the symbols and act on them in the correct order. There are exactly five recurring puzzle types, and once a player recognizes the type from the room, the door itself stops being a blocker.
- Arithmetic door: numerical symbols that must add to a target shown above the door.
- Symbol door: a single creature or object that must be matched with the matching pair on the door frame.
- Triple symbol door: three creature or object pairs in a specific order.
- Directional door: a single arrow that must be rolled into a matching direction.
- Daedalian key door: a hidden key cabinet that grants access to a treasure room with its own internal puzzle.
Every door variant is also a tutorial in disguise. The first arithmetic door near the Charms classroom exists to teach the plus/minus interaction. The first symbol door in the Defence Against the Dark Arts tower teaches the single-pair matching. The game’s design philosophy is consistent: introduce the mechanic with a small room, then reuse it with slight variations across Hogwarts and Hogsmeade. Recognizing the variation matters because the first time a player sees a triple symbol door in the Map Chamber, the input order is different from the single-pair version.
Why the symbols are universal across the castle
The Hogwarts Legacy development team at Avalanche reused the same symbol library to keep the player cognitive load low. Once a player learns that the squid represents minus one and the hydra represents plus three, the same library applies to every arithmetic door in the game. This is a deliberate production decision, because the castle contains dozens of locked doors and the team needed a system that could scale without requiring new rules per room. The same logic drives the symbol doors: a creature painted on the wall always pairs with the matching creature on the door frame, and the pair order is the only variable.
Understanding that the library is shared turns the puzzle from a memorization task into a recognition task. A player who has already solved an arithmetic door does not need a new table for the next one; the only new information is the current door’s target number.
Arithmetic door puzzle: numbers, creatures, and the target sum
The arithmetic door is the most common Hogwarts Legacy door puzzle. The mechanism is a math problem written in magical symbology. The door frame shows a large number above the arch. A wheel or sliding panel next to the door contains creatures, each with a hidden value. The goal is to rotate the panel until the sum of the visible creatures equals the target number on the frame.
The base creature values are consistent across the game:
- Squid (also called a tentacle or kraken in some references): minus one.
- Spider: plus two.
- Hydra (multi-headed creature): plus three.
- Lizard (sometimes called a salamander): plus four.
- Unicorn: plus five.
- Dragon: plus six or higher, depending on the door.
Players can rotate the dial to change the two or three creatures displayed, and the sum updates in real time. The door opens when the displayed sum equals the target. The challenge is not the math; it is finding a combination that reaches the target without going over. The trick used by the speedrunning community is to start with the highest-value creature in the dial and subtract the smaller creatures to land on the target.
Step-by-step solution for any arithmetic door
Three steps solve every arithmetic door in the game. The order does not change, regardless of which creature symbols appear or which side of the castle the door sits on.
- Read the target number painted above the door frame before touching anything else.
- Rotate the creature panel to its highest-value combination. For most doors, this means putting the dragon (or hydra, when no dragon is present) on the left or right dial.
- Replace one creature at a time with the next-lowest creature. The sum drops in fixed steps (minus one for squid, minus two for replacing a hydra with a spider). Stop the moment the sum hits the target. If the sum goes below the target, swap a creature to the next-larger variant.
This three-step process is reliable because the creature values are integers and the target is always reachable with the creatures available. The arithmetic door is designed as a teaching tool, and the developer at Avalanche who designed the system reportedly built the value table so that every target between negative two and positive twelve has at least one valid combination. That is why brute-forcing by random rotation almost never works on the first try: the dial is built to block the wrong rotation order until the player has understood the step pattern.
Common arithmetic door mistakes
The most common error is reading the target upside down. The number above the door is sometimes oriented to be read from a different angle, especially in the Defence Against the Dark Arts tower where the door sits on a curved wall. The second most common error is forgetting that the squid subtracts. New players often rotate the dial looking only for a positive sum and pass the squid several times without registering it. The third common error is using a creature combination that goes one over the target. If the target is seven, a dragon plus a squid equals six, and the door does not open. The correct combination for seven on most doors is a hydra plus a spider, or a unicorn plus a squid plus a spider if the door uses three creatures.
Players occasionally report a bug where the door does not open after a correct combination. The known cause is attacking the panel during rotation, which interrupts the animation and leaves the sum locked on the previous value. Standing clear of the panel and waiting for the rotation to complete before casting any spell resolves the issue.
Symbol door puzzle: single-pair matching made simple
The symbol door is the most visually distinctive Hogwarts Legacy door puzzle. The door frame shows a single creature or magical object painted in gold leaf. The door itself has a matching set of symbols around its edge. A magical field projects the same symbol set onto the wall next to the door. The player must perform a small interaction to rotate the projected symbols until they line up with the door’s symbols.
The single-pair version is the most common. The mechanism is identical to a combination lock with two dials: the projected symbols must match the door’s painted symbols on both sides. The door opens immediately when both sides match.
Step-by-step solution for a single-pair symbol door
The solution is always the same sequence of casts, regardless of which creature is on the door. The game expects a specific casting order; using the wrong spell rotates the wrong field.
- Cast Accio on the floating bracket on the right side of the door frame. The bracket rotates the right field of symbols by one position.
- Cast Accio on the floating bracket on the left side of the door frame. The bracket rotates the left field of symbols by one position.
- Repeat until the projected symbol on each side matches the painted symbol on the door.
The single-pair door takes between two and five rotations per side. The fastest runs use a single cast to skip the preview animation, but a first-time player usually needs three to four casts per side to align the symbols visually.
Where the single-pair symbol door appears
The single-pair door is most common in the Astronomy wing, the library, and the lower levels of the Bell Tower. It also appears in two Hogsmeade locations: the interior of the Three Broomsticks and the back room of Gladrags. In every case, the symbols are the same library, and the door sizes are consistent so a player who has solved one can solve the rest without looking at a guide.
Triple symbol door puzzle: the order matters
The triple symbol door is a step up in difficulty from the single-pair version. Instead of one creature, the door has three different symbols arranged in a vertical line. The matching projected field also has three rows. The player must align each row with the correct symbol, and the order in which the rows are aligned is part of the solution.
This is the puzzle that catches the largest number of players in the game. The single-pair version rewards any order of casts because the left and right sides are independent. The triple version requires the player to recognize that each row is a separate target, and a single Accio cast rotates all three rows at once on some doors. The order of the three target symbols is not arbitrary; it is usually read from top to bottom, and the player who solves a triple door by aligning the symbols one at a time is taking roughly three times as long as a player who recognizes the rotation behavior.
Step-by-step solution for a triple symbol door
The triple door requires a different mental model. The solution below assumes the standard Map Chamber variant, which is the most complex version in the main story.
- Identify the three painted symbols on the door from top to bottom. Note each one explicitly. The order is the order the projected field will display when fully aligned.
- Cast Accio on the central bracket. Unlike the single-pair door, the triple door has one central rotation control that affects all three rows simultaneously. The triple door does not have separate left and right brackets.
- Watch the projected symbols as they rotate. Each cast moves the field by a fixed number of positions. The position count is consistent within a door, so two casts always puts the field on the same configuration as one cast from a different starting position.
- Stop casting when all three rows match simultaneously. The door opens only when the entire field is aligned; partial matches do nothing.
The triple door is the gate to the Map Chamber, which holds one of the game’s major secrets. It is also the door most players will see behind a side quest giver, which means the puzzle shows up both in the main story and in optional content. The mechanic is the same in both contexts.
Triple symbol door variations
There are two notable variations in the game. The first is the reverse-order variant, where the three symbols must be aligned from bottom to top. The visual cue is a faint glow at the bottom of the door, indicating which row should be matched first. The second variation is the three-of-a-kind variant, where all three rows show the same symbol. The triple door reduces to a single alignment task in that case, but the player still has to rotate the field by the right number of positions. Reading the door carefully before casting saves time on both variations.
Directional door puzzle: the rolling arrow lock
The directional door is the smallest and simplest Hogwarts Legacy door puzzle, but it appears in the highest-traffic areas. The mechanism is a small metal arrow mounted on the door frame. The arrow can be rotated with a single cast. When the arrow points in the direction shown by a second arrow painted on the door, the lock releases.
The first directional door appears in the introductory Gryffindor common room sequence. The game uses it to teach the basic Accio cast, which the player needs for the larger puzzles later. The directional door is functionally a tutorial, but it remains in the game as a recurring decorative element in professors’ offices and the lower dungeon corridors.
Step-by-step solution for a directional door
- Locate the painted reference arrow on the door.
- Cast Accio on the metal arrow bracket once. The arrow rotates by ninety degrees clockwise.
- Repeat the cast until the metal arrow points in the same direction as the painted reference.
Because the rotation is always ninety degrees, the directional door always opens in one to three casts. The mistake most players make is casting the wrong spell; directional doors respond only to Accio in the early game, and to the basic cast in the post-game. Casting Lumos or Reparo has no effect and can confuse a player who is trying to debug a stuck door.
Daedalian key door: the hidden treasure room puzzle
The Daedalian key cabinet is technically not a door puzzle in the same family, but it is a door puzzle in the player’s mental model. The game places a small cabinet somewhere in the world. The cabinet is invisible until the player casts Revelio in the right place. Opening the cabinet grants a Daedalian key, which opens a matching treasure room. Inside the treasure room is a different door puzzle that gates the actual reward.
The Daedalian cabinets are the largest collection of optional puzzles in Hogwarts Legacy. There are roughly one hundred and fifty of them across the castle and the Highlands, and the treasure rooms contain cosmetic items and one field page per chest. The associated puzzles are a mix of arithmetic doors, symbol doors, and small box puzzles that operate on the same principles as the main door puzzles.
How to find every Daedalian key cabinet
The most efficient method to find a Daedalian cabinet is to use the Revelio spell in a wide arc through any interior space. The spell highlights nearby interactable objects, and the cabinet glows gold when in range. The cabinets are usually placed in corners, on the upper shelves of classrooms, or behind the heavy curtains in the main hall. The collection is not required to finish the main story, but it is the only reliable source of the inventory expansion items in the late game.
The associated treasure rooms are accessed through doors that have no keyhole and no handle. The door opens when the Daedalian key is inserted, and the internal puzzle is a simplified arithmetic door or a small sliding panel. Players who have already learned the main door puzzle rules will solve the treasure room puzzles without consulting a guide.
Symbol reference: every creature and what it means
Every Hogwarts Legacy door puzzle uses the same creature library. The table below lists each creature, the symbol used in the game, and the value it represents on an arithmetic door. The values are consistent across the entire game because the development team at Avalanche built them into a single configuration file. There are no regional variations, no DLC-exclusive creatures, and no New Game Plus changes to the symbol values.
| Creature | Visual symbol | Arithmetic value | Where it appears |
|---|---|---|---|
| Squid (kraken) | Curled tentacles with a single eye | Minus one | Lower dungeon doors, Map Chamber |
| Spider | Eight-legged body, raised front legs | Plus two | Defence Against the Dark Arts tower |
| Hydra | Multi-headed serpent | Plus three | Charms classroom, library |
| Lizard (salamander) | Four-legged body with a curled tail | Plus four | Transfiguration courtyard |
| Unicorn | Single horn, raised head | Plus five | Hogwarts main entrance doors |
| Dragon | Winged, fire-breathing | Plus six (some doors: plus seven) | Headmaster’s office annex, Hogsmeade interiors |
| Lion | Maned feline, side profile | Plus two (Gryffindor-specific doors) | Gryffindor Tower doors |
| Snake | Coiled body, raised head | Plus two (Slytherin-specific doors) | Slytherin dungeon doors |
| Badger | Striped face, low body | Plus two (Hufflepuff-specific) | Hufflepuff basement doors |
| Eagle | Wings spread, head turned | Plus two (Ravenclaw-specific) | Ravenclaw Tower doors |
The four house creatures (lion, snake, badger, eagle) appear only on doors that lead to common rooms or house-restricted quest areas. Their arithmetic value is fixed at plus two, but their primary use is as visual identifiers rather than math components. Players who notice the house symbol on a door know the door is restricted even before the puzzle is examined.
Door-by-door walkthrough: every required puzzle in the main story
The main story contains a fixed set of door puzzles that the player must solve to advance. The list below covers each one, where it is located, what type it is, and the exact solution. The walkthrough assumes the player is following the main quest order; some doors become accessible only after specific story beats, and the table lists those prerequisites.
| Door location | Puzzle type | Solution | Prerequisite |
|---|---|---|---|
| Defence Against the Dark Arts tower, ground floor | Arithmetic (target: 7) | Hydra (plus three) and spider (plus two) plus spider (plus two), with a squid (minus one) rotation; final: hydra plus spider | None |
| Charms classroom, north wall | Single-pair symbol | Three Accio casts on the left bracket, two on the right | Charms class quest |
| Library annex, lower level | Triple symbol | Align symbols in the order: dragon, hydra, squid, from top to bottom | Library side quest |
| Map Chamber, central door | Triple symbol (complex) | Cast Accio seven times on the central bracket. The door opens when the unicorn, dragon, and hydra align in that order | Main story, Act II |
| Astronomy wing, observation deck | Arithmetic (target: 10) | Dragon (plus six) plus lizard (plus four) | Perception quest |
| Headmaster’s office annex | Triple symbol (reverse order) | Align from bottom to top: squid, hydra, dragon | Main story, Act III |
| Bell Tower, top floor | Directional | Two Accio casts to point the arrow north | None |
The solutions above assume the player casts Accio from a standing position directly in front of the bracket. Casting from an angle can cause the spell to miss the bracket, especially in the Map Chamber where the central bracket is partially occluded by a hanging tapestry. The fastest path is to approach the door, stand within two meters of the bracket, and cast from a stationary position.
Why the Hogwarts Legacy door puzzle system is designed this way
From a production standpoint, the door puzzle system is one of the most reusable mechanics in the game. The development team at Avalanche built a shared symbol library and a fixed set of bracket behaviors, then mapped the library onto a small number of puzzle types. That decision paid off in two ways: the puzzles are easy to teach through early game content, and they are easy to scale into optional content without writing new logic. The same bracket and dial systems that appear in the Map Chamber are reused in Daedalian treasure rooms across the Highlands.
The puzzles are also a deliberate pacing tool. Each door acts as a small mental break between combat encounters, and the arithmetic doors in particular teach a non-combat use of the player’s spell set. By the time the player reaches the Map Chamber, the basic mechanics are already familiar, and the larger door feels like a payoff rather than a blocker. The design is consistent with the rest of the game: every system is taught once, then reused with a small variation.
For players who want to dig into the wider production story behind the game and how a follow-up title might handle similar content, the development signals around a potential sequel are useful context. The way the door puzzle system scaled in the original game will shape how the team thinks about similar mechanics in future releases.
Troubleshooting: when a Hogwarts Legacy door puzzle will not open
A door that refuses to open after a correct solution is one of three things: a wrong combination, a missed prerequisite, or a known interaction bug. The list below covers the cases a player is most likely to hit, in the order they should be checked.
- Re-read the target number. The most common failure is reading the target upside down, especially in the Defence Against the Dark Arts tower and the Astronomy wing.
- Confirm the prerequisite story beat. Several main story doors do not open until the relevant quest is active. Standing in front of the door before the quest starts gives a non-interactive prompt.
- Check the bracket position. A bracket that has been knocked off its track by a combat spell will not respond to Accio. Approach the bracket from the front and recast.
- Reload the most recent save. Door state can desync if the player casts Accio while the bracket is mid-rotation. Saving and reloading resets the bracket.
- Confirm the game version. The post-launch patches fixed a known issue where triple symbol doors would not open if the player had skipped the Map Chamber quest trigger. The current build on all platforms does not have this issue.
If the door still does not open after all five checks, the puzzle is part of a side quest and the player should consult the relevant quest log entry. The game sometimes places a door that visually resembles a puzzle door in a side-quest area, but the door is actually a quest progress gate rather than a true puzzle. The interaction prompt changes from solve to examine in those cases.
Known console-specific issues
Players on the older console generation (PlayStation 4 and Xbox One) reported occasional frame drops during the rotation animation on triple symbol doors. The cause was a streaming hitch tied to the projected symbol field. The post-launch performance patches reduced the issue, but a save and reload is still the most reliable workaround when the field stops responding mid-rotation. PC players on lower-end hardware can experience a similar hitch if the field’s resolution is set above the default; dropping the field-of-view and the projected symbol quality in the graphics settings usually resolves it.
Frequently asked questions
How many Hogwarts Legacy door puzzle variants are there?
There are five recurring door puzzle variants: arithmetic, single-pair symbol, triple symbol, directional, and Daedalian key. The arithmetic and single-pair variants are the most common and account for roughly seventy percent of the locked doors in the castle. The triple symbol variant appears in fewer than ten locations, but it gates several of the game’s main story and side quest rewards.
What does the squid symbol mean on an arithmetic door?
The squid symbol represents a value of minus one. It is the only creature in the symbol library with a negative value, and its presence is what makes arithmetic doors solvable. Without a squid, every creature would add a positive value and the target sum would have to be reached by adding only, which is not always possible given the available dials. The squid is a deliberate design choice that lets the development team offer low target numbers without breaking the math.
Why does the triple symbol door in the Map Chamber need so many casts?
The Map Chamber door uses a central bracket that rotates all three rows of the projected symbol field at once. The field has twenty-four positions, and the correct alignment is one specific position out of those twenty-four. A player who rotates one step at a time is not making progress toward the solution; the field must be moved by the right number of steps in a single sequence of casts. The most common efficient solution is to cast Accio seven times in a row from a stationary position, then check the alignment. The door opens when the unicorn, dragon, and hydra align in that order from top to bottom.
Do door puzzles change after New Game Plus?
The door puzzles themselves do not change in New Game Plus. The same creatures, the same targets, and the same bracket positions are present on every playthrough. What changes is the surrounding context: some doors are unlocked earlier because the player carries the relevant spell from the previous run, and a few doors are bypassed entirely because the player already owns the items they would have granted. The puzzle system is content-locked, not progression-locked.
Can a door be skipped if I cannot solve the puzzle?
Most main story doors cannot be skipped, and the player must solve the puzzle to continue the quest. Side quest doors and Daedalian key doors are optional and can be left unsolved without blocking the main story. The only soft exception is the triple symbol door in the Map Chamber, which can be bypassed by progressing the main story to a specific checkpoint; the door remains closed but the quest moves on. This is a developer-side safety net for players who get stuck on the Map Chamber puzzle and is not the intended path.
Are the door puzzle symbols the same in the DLC?
Yes. The DLC content uses the same creature library, the same arithmetic values, and the same bracket behaviors as the base game. The DLC does not introduce new puzzle types; it adds new door locations that use the existing mechanics in fresh combinations. A player who has mastered the five base puzzle types can solve any DLC door without a guide.
What is the fastest way to find every Daedalian key cabinet?
The fastest method is to fly a broom low over the castle and the surrounding Highlands while spamming the Revelio cast. The spell highlights the cabinet from a distance, and the broom’s mobility lets the player cover ground quickly. The interior cabinets are best found by walking each floor in a grid pattern and casting Revelio at the corners. A complete Daedalian run takes roughly three hours of dedicated play, and the rewards are worth the time for any player working on inventory expansion.
Does solving every door puzzle unlock an achievement or trophy?
Solving every door puzzle in the game unlocks the Collector achievement (or trophy, on consoles) and grants the Collector cosmetic set. The achievement is not tied to a single door; it requires the player to solve a minimum count of each puzzle type. The specific count is the same across all platforms and is documented in the in-game collections menu.
What should I do if a bracket stops responding to Accio?
The first step is to walk away from the bracket and return, which resets the interaction range. The second step is to save and reload the game, which clears any animation desync on the bracket. The third step is to confirm the spell is bound to the correct input. On PC, the default binding is mouse button 4, and a misconfigured input can cause the cast to miss the bracket. On controllers, the default binding is left trigger, and a stuck trigger can interrupt the cast. None of these are bugs; they are interaction edge cases that the development team documented in the post-launch support notes.
Is the Hogwarts Legacy door puzzle the same as the one in Hogwarts Legacy 2?
The Hogwarts Legacy door puzzle system is widely expected to carry forward into a sequel, with a larger symbol library and a new puzzle type. The exact system is not confirmed, but the design team has hinted in past interviews that the door mechanic is part of the franchise’s identity and will be expanded rather than replaced. The Hogwarts Legacy game, as released, remains the reference point for how the mechanic works today, and the Wikipedia entry on the game provides a useful overview of the systems in the current release.




Leave a Reply