
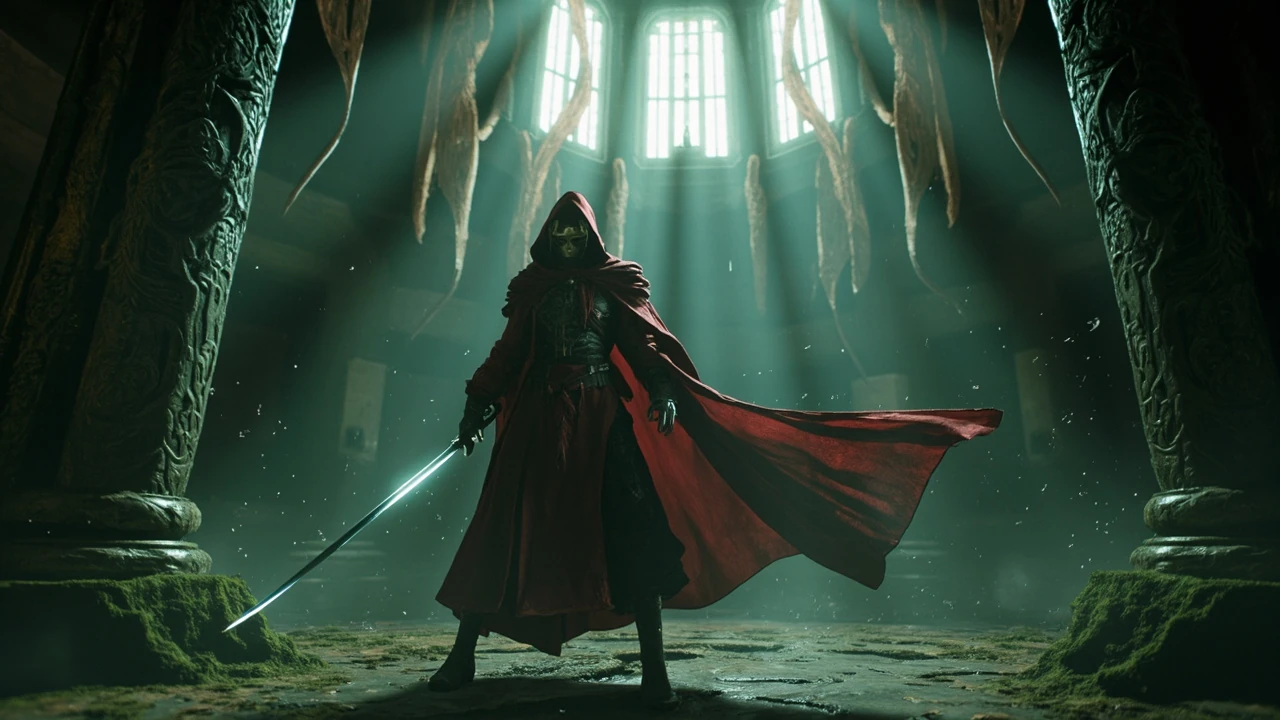
A new Hollow Knight game brings more than a fresh map, a new protagonist, and a refreshed moveset. It also changes how encounters are designed, telegraphed, and learned. The set of silksong bosses the player will face reflects deliberate choices about pacing, mechanical density, and how the studio wants players to read combat. This guide focuses on what the encounter design implies for player preparation, what the revealed mechanical differences tell us about fight structure, and where caution is warranted before the game is fully in players’ hands.
Where earlier coverage has leaned on hype or general impressions, the practical questions are more specific. How long is a typical silksong boss fight expected to last? Which abilities are likely to matter? What signals the studio has given about optional versus required encounters? The goal here is to give players and production-minded readers a framework they can use once the game is in hand, while staying careful about what is and is not officially confirmed.
Silksong bosses and what the encounter design signals
The roster of silksong bosses is one of the most discussed aspects of the sequel. The original game built its identity around combat encounters that demanded observation, pattern recognition, and incremental mastery. The sequel appears to extend that philosophy with denser enemy placements, new tool-driven approaches, and a larger cast of named opponents, based on the materials and previews that have been publicly discussed.
What the encounter design signals, beyond the specific opponents, is a continued commitment to combat as a system the player learns rather than a difficulty wall the player must overcome through gear or grinding. The mechanical layer around bosses, including movement, healing, and tool use, is the place where preparation actually pays off.
How encounter design shapes player expectation
Players coming from the first game have built a mental model of how a boss fight feels: a defined arena, a readable opening pattern, a mid-fight escalation, and a final phase that asks the player to combine what they have learned. The sequel’s encounters appear to keep that structure but raise the mechanical ceiling, which has practical consequences for how a player should prepare.
- Expect an opening phase that is more about reading the opponent than dealing damage.
- Expect mid-fight transitions that introduce a new attack layer rather than just raising stats.
- Expect healing windows to be shorter and tied to specific movement outcomes.
- Expect the late phase to test composure under combined pressure rather than raw reaction time.
Those four expectations are not spoilers for any specific fight. They are the predictable shape of combat in this style of game, and the pre-release materials that have been shared publicly point in that direction.
Confirmed facts and what they rule out
- The sequel features a new protagonist with a different moveset, including a needle-based primary attack, a silk-driven ability system, and a revised healing mechanic.
- Crest and tool systems are expected to be more central to combat than in the first game, including the way some boss encounters can be approached.
- The map is reported to be larger, with a wider variety of biomes and enemy types than the first game.
- Boss encounters, including optional ones, are expected to be a meaningful part of progression and exploration rather than standalone challenges.
What those facts rule out is the equally common assumption that the sequel will simply be a difficulty multiplier on the first game. The mechanical changes around silk, crests, and tool use mean that the way a player approaches each fight is part of the design, not just a side consideration.
How fight length and pacing tend to be structured
One of the most practical questions a player has before any new game is how long a fight is expected to take. Although exact timing for any specific silksong bosses is not known until the game is in players’ hands, the design language of the studio’s previous work gives a useful baseline for expectation setting.
The original game generally structured boss fights into two or three escalating phases, with each phase introducing a new attack pattern or environmental wrinkle. The most memorable fights in the first game were not the longest, but the ones that asked the player to combine several learned skills under pressure. The sequel appears to extend that approach with more granular tool use, which can lengthen a fight for a new player and shorten it for a player who has internalized the tools.
A practical model for thinking about fight length
Rather than promising a specific number of minutes per fight, it is more useful to think about fight length in three categories that map to player state.
| Player state | Typical first attempt | After pattern recognition | Once tools and route are optimized |
|---|---|---|---|
| Learning the moveset | Several minutes per phase, frequent healing and resets | Two to three attempts before phase consistency | Consistent clears with the right crest and tool setup |
| Already familiar with the studio’s combat language | Reduced hesitation, faster pattern absorption | Single-attempt clears on most opponents | Optimization on movement and resource use |
| Returning player with muscle memory | Reads the new moveset quickly, transfers prior skills | Focuses on the unique new attacks rather than basics | Pushes the encounter for speed and efficiency |
The model is not a promise. It is a way to set expectations so that a player who spends longer than they expected on a given fight understands that the design has layered depth, rather than assuming the fight is unfair.
Reading telegraphs and attack windows
Every encounter in this style of game is built on telegraphs: visual and audio cues that signal what an opponent is about to do. The most common failure mode in preparation is not a lack of skill, but a tendency to react to the attack itself rather than the telegraph. A player who internalizes the telegraph typically finds the same fight easier on the second or third attempt, even without any change in gear.
Layers that silksong bosses are likely to emphasize
- Position-based telegraphs. Movement is the primary defense, so the most important cue is often where the opponent is facing or how it shifts its weight, not the swing itself.
- Audio layering. Multiple audio cues are likely to overlap in a busy phase, which trains the player to separate the critical cue from the ambient noise.
- Visual redundancy. Expect some attacks to signal in two ways at once, which helps players with different sensory preferences.
- Phase transitions. The transition itself is usually a small vulnerability window, but the new attack set after the transition is the real test.
The first time through, the player is mostly reading telegraphs. On later attempts, the player is mostly executing a plan, and the telegraphs become a checklist rather than a puzzle.
Tools, crests, and how they change the approach
The crest and tool systems are the part of the sequel that has the largest visible effect on how silksong bosses are approached. In the original game, charms provided passive build customization. The sequel appears to make crests and tools more central, with crests shaping the protagonist’s baseline moveset and tools providing active combat options that consume resources.
For a player, this means that the question of how to prepare for a fight is not only about how skilled they are at dodging. It is also about which crest and tool loadout they bring, and whether that loadout is appropriate for the encounter’s pressure profile.
Common build shapes to keep in mind
- Defensive build. Prioritizes healing, longer windows, and the ability to recover from mistakes. Suited to learning a new fight.
- Aggressive build. Prioritizes damage windows, dash pressure, and shorter fights. Suited to players who have already learned the pattern.
- Tool-heavy build. Uses silk-consuming tools to control the arena, deal damage at range, or open a new approach to a specific opponent.
- Hybrid build. Balances combat and exploration tools, useful for areas where the player is still learning the route and may face optional encounters.
The right build for a specific fight depends on the player’s confidence with the pattern. A new player who is still learning a fight often benefits more from a defensive build than from an aggressive one, even if the aggressive build is theoretically faster.
Where fight difficulty actually comes from
Difficulty in this kind of game is rarely a single number. It is the product of several pressures that the player has to manage at the same time, and the way those pressures interact during a fight is what makes a given boss feel harder or easier than its raw attack list would suggest.
Sources of pressure in a single fight
| Pressure source | What it asks of the player | Where it tends to show up in a fight |
|---|---|---|
| Positioning | Stay in a useful zone, avoid being cornered | Throughout the fight, especially after the arena changes |
| Resource management | Spend healing and tools at the right moments | Mid-fight, when the player has used some resources and the next phase is incoming |
| Pattern recognition | Read the next attack before it lands | Throughout, with peaks after each phase transition |
| Combo execution | Chain attacks, movement, and abilities in a single sequence | Damage windows, where the player has limited time to capitalize |
| Composure | Stay consistent across long attempts | Late fight, when the player is most likely to slip into panic patterns |
When a player says a particular fight is “hard,” they are usually reacting to one of those pressures being more intense than expected, not to the others. Identifying which pressure is the source of the friction is the first step in deciding what to change.
Preparation before the fight
Most encounter difficulty is decided before the fight begins. The player’s loadout, route, and mental state going in are usually the difference between a clean first attempt and a long, frustrating one. Preparation is also the part of the game that the studio has signaled will be more central in the sequel, because the tool and crest systems make pre-fight choices more meaningful.
What to check before walking in
- Crest fit. Does the current crest emphasize the kind of movement and damage windows the player relies on?
- Tool reserves. Are there enough tool resources, and do the equipped tools match the likely encounter profile?
- Healing stock. Is the player’s healing resource in a healthy range, or does the player need to spend time recovering first?
- Route memory. Is the path to the arena clear, and is the player confident they can repeat it under fatigue?
- Mental state. Is the player alert, or are they going into the fight after a long stretch of other content where reaction time is dulled?
None of those checks guarantee a win, but skipping them is one of the most common reasons that a fight that should be winnable becomes a wall.
Between attempts: how to learn from a loss
Losing a fight is data, not failure. The first loss usually tells the player one specific thing about the encounter, and the second loss usually tells them another. The most efficient way to learn is to pick one observation per attempt and verify it on the next one, rather than trying to learn everything at once.
A simple loop for between-attempt learning
- After the loss, identify the single moment where the attempt went wrong.
- Write down or mentally note the cue that preceded that moment.
- On the next attempt, focus only on that cue, not on winning.
- If the cue is read correctly, the next loss is usually at a different moment, and the player has a new specific focus.
That loop is slower than it feels, and that is the point. The player’s job is to shrink the unknown, not to clear the fight. Once the unknown is small enough, the fight clears itself.
How the game’s structure affects encounter pacing
One of the more interesting design questions about silksong bosses is how they fit into the larger structure of the game. The original game is known for interleaving optional content, hidden encounters, and progression-gated bosses, and the sequel’s larger map suggests a similar but denser pattern.
Categories of encounter the player should expect
- Required progression bosses. These gate access to a new area or a key item and are the most clearly signposted.
- Optional exploration bosses. Found in side areas, often tied to a crest, tool, or narrative thread. They reward curiosity with build options and lore.
- Mini-bosses and tough enemies. Enemies that are not full bosses but still represent a meaningful combat challenge, often used to test a new tool or movement option.
- Endgame and challenge content. High-difficulty encounters designed for players who have already completed the main progression and want a more demanding test.
Knowing which category a fight falls into helps the player calibrate effort. A required progression boss usually demands a higher level of preparation than a tough enemy, and an optional boss often rewards the player for arriving with a specific build in mind.
Accessibility and player choice
Accessibility is one of the areas where the studio has been more visible in the original game, and the sequel is expected to continue that direction. The first game offered several ways for players to tune the experience, and similar options in the sequel would have a direct effect on how silksong bosses are approached.
What accessibility options typically change
- The speed of incoming damage, which affects how forgiving the encounter is for players who are still learning.
- Healing and resource balance, which can shift the pressure profile of a fight.
- UI clarity, including how much information the game shows about the player’s own state and the opponent’s state.
- Control customization, which can matter a lot for players who rely on specific input methods.
It is important to separate confirmed mechanics from speculation, because encounter difficulty is one of the most over-claimed topics in any game’s pre-release cycle. The information that has been publicly shared and is reasonable to treat as fact includes the following points, drawn from the studio’s own materials and the publicly visible differences page on differences and new features from the Hollow Knight: Silksong guide on IGN, which provides useful background for this point.
These are settings, not shortcuts. They are part of how the player prepares, alongside loadout and route, and they should be chosen on the same basis: what does the player actually need to learn this fight?
What the studio’s design language tells us
The studio behind the original game has a recognizable combat language. The sequel’s pre-release materials extend that language rather than replace it, which is useful information for players who want to prepare in advance. Knowing the language means the player is not starting from zero, even with a brand new set of opponents.
Patterns players can transfer from the first game
- Healing as a commitment. Healing in this style of game usually requires a window, not just a button press, and that habit transfers.
- Tool use as a decision. Tools are resources, not crutches, and that mindset transfers directly to the sequel’s tool-heavy approach.
- Exploration before escalation. The first game rewarded players who explored before pushing the next progression gate, and the larger map in the sequel is expected to reward the same habit.
- Pattern reading over reaction. Reading a telegraph is always faster than reacting to the attack, and that priority transfers.
For a returning player, the most efficient preparation is often to trust those habits rather than trying to rebuild from scratch.
What the broader context of the series tells us
The original Hollow Knight entry on Wikipedia is a useful reference for the design history of the studio, the game’s mechanical structure, and the way the series frames boss encounters as part of exploration rather than as standalone challenges. Reading that background can help a player understand why a particular fight in the sequel feels the way it does.
That broader context is also useful for production-minded readers. The design decisions behind the sequel’s encounters reflect a philosophy that has been consistent across the studio’s output, and recognizing that consistency helps explain why some of the sequel’s choices look the way they do.
Common pitfalls when preparing for a fight
Most preparation mistakes are not about being underprepared. They are about being prepared in a way that does not match the fight. A few patterns come up often enough to be worth naming.
Pitfalls worth watching for
- Over-investing in damage. A build that maximizes damage can shorten a fight, but it can also make mistakes more punishing.
- Under-investing in healing. A build that runs out of healing resources before the late phase is a common cause of repeated losses at the same point in a fight.
- Tool mismatch. Bringing tools that are not useful against a specific opponent wastes the most flexible part of the loadout.
- Route fatigue. A long path to the arena, repeated several times, can dull the player’s reaction time and make the fight harder than it is.
- Expectation mismatch. A player who expects a fight to behave like a different fight in the same game will misread telegraphs and lose time they could have spent learning.
Naming those pitfalls is useful because they are not obvious in the moment. They tend to show up only after several attempts, which is the exact point at which the player is most likely to commit to a bad habit.
What is still unknown
Several questions about silksong bosses remain officially unconfirmed at the time of writing. The information that has been publicly shared is enough to set expectations, but not enough to answer detailed questions about a specific fight.
Questions that are still open
- The exact roster of silksong bosses, including which are required for progression and which are optional.
- The detailed mechanics of each encounter, including arena size, phase structure, and attack patterns.
- The intended difficulty curve, including how the encounters are spaced across the game’s progression.
- The role of endgame content, including whether the sequel will include a challenge mode or a high-difficulty post-game layer.
- The exact tuning of the accessibility options and how they interact with specific encounters.
Those questions are best answered by playing the game. The framework in this article is meant to be useful while waiting, and to remain useful once the game is in hand, by giving the player a structured way to approach each new fight.
A practical pre-fight checklist
For readers who want a single, scannable summary of the preparation steps, the following checklist captures the core of what has been covered above. It is not a substitute for learning the fight, but it is a reliable way to avoid the most common avoidable losses.
| Step | What to confirm | Why it matters |
|---|---|---|
| Crest | Crest matches the player’s preferred combat style for the encounter | Wrong crest makes the fight feel harder than it is |
| Tools | Tools are appropriate to the opponent and have enough resources | Tool mismatch is a common silent source of lost attempts |
| Healing | Healing stock is full, and healing windows are understood | Empty healing at the wrong moment is a frequent cause of repeated losses |
| Route | Path to the arena is clear and repeatable | Route fatigue is a quiet but real pressure |
| Mental state | Player is alert, not rushing | Rushed attempts often lose at the same moment every time |
| Focus | One observation per attempt | Focused learning is faster than trying to learn everything at once |
Used consistently, that checklist turns a long, frustrating fight into a structured process. It does not make any specific fight easier, but it makes the player’s progress predictable, which is the actual goal.
How this framework holds up over time
The framework in this article is built on the studio’s design language, the publicly confirmed mechanical differences, and the structure of the original game. It is meant to be a stable starting point that the player can adjust as they actually play the sequel.
What to keep, what to change
- Keep. The general shape of the encounter, the importance of telegraphs, and the role of preparation.
- Keep. The habit of treating healing and tools as resources to be managed, not buttons to be pressed.
- Change. The specific crest, tool, and route choices, once the player has actually seen the fights in question.
- Change. The mental model of which pressure source is the bottleneck, once the player has identified it from real attempts.
That balance between stable principles and specific adjustments is what makes the framework useful across a whole roster of opponents, rather than just the first one the player encounters.
Frequently asked questions
How many silksong bosses are there?
The exact roster of silksong bosses has not been officially confirmed in full. Pre-release materials and public previews suggest a larger and more varied set than the first game, with both required progression encounters and optional exploration encounters. Players should treat any specific number as preliminary until the game is in hand and the full list is visible.
Are silksong bosses harder than in the first game?
The sequel is expected to be mechanically denser, with more tool and crest options that change how each fight is approached. Whether that makes any specific fight harder depends on the player’s familiarity with the new tools. A returning player who has internalized the new systems will often find encounters more manageable than a new player, even when the raw difficulty is higher.
Do I need to explore the whole map before the required bosses?
Exploration is part of how the player prepares for required encounters, because the tools and crests found in optional areas are often the most effective way to approach later fights. The original game rewarded exploration before progression, and the sequel’s larger map is expected to follow the same principle. A player who rushes the required path will usually face later fights with a narrower set of options.
What is the best way to learn a new silksong boss?
Pick one observation per attempt and verify it on the next try, rather than trying to learn the whole fight at once. That approach is slower than it feels, and that is the point. The player’s job is to shrink the unknown, not to clear the fight, and the unknown shrinks faster with one focused observation per attempt than with several unfocused ones.
Do accessibility options change the difficulty of silksong bosses?
Accessibility options in this style of game are usually settings, not shortcuts. They are part of how the player prepares, alongside loadout and route, and they should be chosen on the same basis. A player who is still learning a fight often benefits from a more forgiving setting, while a player who already knows the fight can use the same setting to focus on optimization rather than survival.
Can I beat silksong bosses with a defensive build?
A defensive build is often the most effective choice for learning a new fight, because it gives the player more room to make mistakes. Once the pattern is understood, a more aggressive build usually shortens the fight. The right build for any specific opponent depends on the player’s confidence with the pattern, not on a general rule.
Are optional silksong bosses worth fighting?
Optional encounters in this style of game usually reward curiosity with build options, lore, or both. They are worth fighting once the player is comfortable with the core combat, because the rewards often open up new approaches to later required encounters. A player who skips all optional content will usually face the endgame with a narrower set of options.
What is the most common reason players get stuck on a boss?
The most common reason is expectation mismatch, not raw difficulty. The player expects the fight to behave like a different fight in the same game, misreads the telegraphs, and loses time they could have spent learning. The fix is usually a brief reset of expectations, not a new build or a new route.
How long should a typical silksong boss fight take?
There is no single answer, because fight length depends on the player’s familiarity with the pattern, the loadout they bring, and the pressure sources involved. The most useful expectation is that a first attempt will be longer than the player expects, and a third or fourth attempt will be shorter than the first, as the pattern becomes familiar.
Where can I find reliable information about a specific silksong boss?
Reliable information comes from the studio’s own materials, the public preview coverage that has been shared, and the player’s own attempts once the game is in hand. Community guides can be useful after the game is released, but pre-release speculation should be treated as speculation, not as a guide.



Leave a Reply