
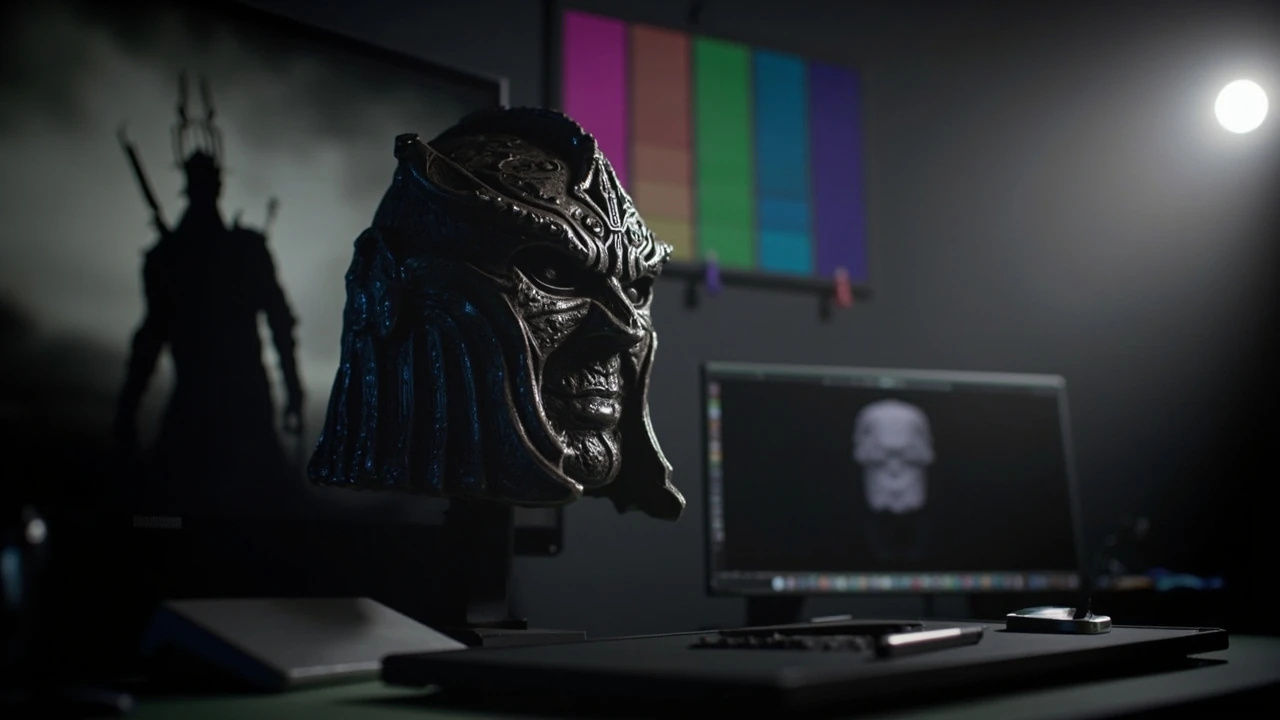
Fierce deity armor as a GameDev case study
Fierce deity armor sits in a small group of game costumes that production teams can analyze for almost every craft discipline at once: concept interpretation, low-poly and high-poly modeling, UV strategy, retopology, rigging for cloth and hair, VFX integration, and the progression math that decides when a player actually wears it. Originally introduced in The Legend of Zelda: Majora’s Mask, the design became a recurring reference point across later Zelda titles and inspired countless fan recreations, cosplay builds, and modding projects. For a studio, the armor is a useful teaching object because the same visual idea has been reinterpreted through 2D pixel art, N64-era low-poly, GameCube-era hybrid rendering, and modern PBR pipelines, which makes the design decisions behind each version especially legible.
This article treats the fierce deity armor as a working case study for game development. It walks through the design legacy that made the costume memorable, the 3D production pipeline a studio would use to recreate it, the technical-art decisions around topology and materials, the gameplay logic that determines when players unlock and equip it, and the localization, accessibility, and live-operations considerations that influence how a costume like this ships today. The goal is a single reference that a concept artist, technical artist, 3D modeler, technical designer, or producer can use to reason about a comparable project, not a celebration of a single item.
Design legacy across Zelda titles
Understanding the fierce deity armor starts with the source material, because the production team needs to know which version of the costume they are recreating. The original design appeared in Majora’s Mask as the Fierce Deity’s Mask, a transformation that replaced Link’s standard model with a taller, slimmer warrior wearing a kabuto-inspired helmet, a long coat, and a sword clearly designed to read at small viewport sizes. Subsequent Zelda titles have reinterpreted the same idea several times, and each reinterpretation tells production teams something different about how to handle a costume that has strong fan recognition.
| Title | Year | Representation | Production notes |
|---|---|---|---|
| The Legend of Zelda: Majora’s Mask | 2000 | Full transformation, replaces Link model | Low-poly N64 mesh, painted texture atlas, hand-keyed animations |
| The Legend of Zelda: Breath of the Wild | 2017 | Helmet only, equippable item | High-poly PBR, cloth simulation, dye channel support |
| The Legend of Zelda: Tears of the Kingdom | 2023 | Helmet only, transmog-friendly data | Shared skeleton, layered armor system, sandbox-friendly set dressing |
| Hyrule Warriors: Age of Calamity | 2020 | Cosmetic skin, Musou combat moveset | Reused base skeleton, custom VFX for sword trails |
| Super Smash Bros. series | 2001 onwards | Alternate costume, palette swap and remodel | Cross-engine port, normalization across fighting game rigs |
Three patterns are worth highlighting for a production team. First, the silhouette does most of the work. The original design holds up at N64 resolution because the helmet shape, the long coat, and the oversized sword create a readable outline even with 32-by-32 textures. Second, later titles treat the costume as a modular system: a single helmet piece in modern entries, a full transformation in the original. A studio planning a port or remaster needs to decide which version is canon for that release. Third, the armor is one of the few Zelda assets that has been deliberately reproduced across engines, which gives production leads a real benchmark when they evaluate rigging, weighting, and shader parity between platforms.
The design has also migrated outside the official pipeline. Fan recreations range from accurate N64 remakes to stylized reimaginings, and modding communities have used it as a test case for custom skeletons, armor physics, and shader injection. For a studio, that ecosystem is useful intelligence: it shows which details the audience treats as canonical and which they treat as flexible. A team porting the armor should expect player scrutiny on the helmet horn geometry, the coat silhouette, and the sword proportions, because those are the features that modders and cosplayers have measured most often.
Concept-to-3D interpretation pipeline
A realistic production pipeline for a fierce deity armor port or original interpretation moves through several distinct stages, and each stage has a different review gate. The pipeline below assumes a modern PBR engine such as Unity or Unreal, but the same structure holds for stylized engines with adjusted budget per stage.
- Reference capture and audit. The team collects screenshots, original-resolution textures where legally available, cosplay references, and the highest-fidelity official art of the relevant version. A reference board is published so every artist works from the same source set.
- Blockout and silhouette test. A blockout mesh is built at gameplay scale, often at low or medium subdivision, and dropped into the engine to check that the silhouette reads against the project’s typical background and lighting. The blockout passes when a reviewer can identify the costume at one-third the typical camera distance.
- High-poly sculpt. A high-poly sculpt captures the helmet horns, the face guard, the coat folds, and the sword geometry. Sculpting happens in ZBrush, Blender, or Mudbox, with subdivision levels tracked so downstream retopology can target a known density.
- Retopology and UV layout. The retopologist builds a game-ready mesh that respects the engine’s draw call budget, skeleton weight flow, and material ID layout. UV islands are arranged for texture density and to keep the helmet horns in a single tile when possible.
- Bake and material authoring. The high-poly is baked to the low-poly, and PBR materials are authored in Substance Painter, Substance 3D Designer, or the engine’s material editor. Channels typically include base color, normal, roughness, metallic, and an emissive layer for any magical detail.
- Rigging and skinning. The mesh is bound to the existing character skeleton. The coat and hair elements are flagged for cloth or hair simulation depending on the engine’s toolset.
- In-engine review and VFX.
- Optimization pass. Triangle counts, texture sizes, material complexity, and shader permutations are audited against the project’s hardware target. Final builds are profiled on minimum-spec hardware before sign-off.
The model is reviewed at gameplay distance, in cinematics, and under the project’s lighting presets. VFX such as sword trails, mask glow, or magical auras are blocked in.
This eight-stage pipeline is standard for a single hero costume. Studios that build an armor set library usually template stages one, two, four, and eight so the cost of adding a new costume stays predictable.
Modeling decisions that define the look
The fierce deity armor is a useful modeling case study because it combines hard-surface and soft-surface work in a single outfit. The helmet is hard-surface with sharp angles and repeating horn geometry; the coat is soft-surface with heavy folds; the sword is hard-surface but needs to flex correctly when the character animates. Each region drives a different modeling decision.
| Region | Modeling approach | Key constraint | Common failure mode |
|---|---|---|---|
| Helmet horns | Subdivision modeling, sharp crease support | Preserve silhouette at minimum view distance | Rounded silhouettes that lose the kabuto read |
| Face guard | Booleans or trimmed plates | Avoid Z-fighting between layered plates | Shadow acne from overlapping plates |
| Coat | Cloth-friendly topology, edge loops along the hem | Maintain silhouette while simulating | Knee poke-through during crouch animations |
| Sword | Hard-surface with IK-friendly grip | Match grip orientation to the rig’s hand pose | Wrist rotation popping during attack transitions |
| Undergarments | Lightweight mesh, often shared with the base body | Keep draw count low when the armor is hidden | Doubled geometry when the armor is unequipped in the same scene |
The coat is usually the riskiest part. Stylized coats with long hems create persistent collision and self-shadowing problems, especially on characters that crouch, roll, or ride mounts. Studios that work on this kind of costume typically do one of three things: build a low-cost proxy mesh and rely on normal maps for detail, integrate the engine’s cloth solver with a tuned stiffness curve, or skip simulation entirely and rely on hand-keyed vertex animation. Each option has a real cost, and the choice usually depends on the platform’s CPU budget and the project’s tolerance for cloth artifacts during cinematics.
Materials, shaders, and lighting
The armor’s modern reads depend heavily on material work. The mask in particular has to read as carved bone or porcelain, with a faint magical glow that the player should notice from across a room but that should not blow out under a bright key light. The classic approach uses three layers: a base PBR material with high roughness and a low-frequency normal map, an emissive layer masked to cracks or eye sockets, and a subtle anisotropic highlight on the horns to suggest worn enamel.
Lighting decisions follow a few rules of thumb that production teams can reuse across the project:
- Key light contrast. The mask is rendered with a key-to-fill ratio of at least 4:1 in previews so the deep shadows under the horns do not flatten.
- Color temperature split. Cool fill, warm key. The split helps the magical glow read without requiring a high emissive value.
- Indirect bounce. At least one bounce light from a near-ground source is added in previews to keep the chin and inner coat visible.
- Anti-aliasing on emissive cracks. A simple FXAA or TAA pass on the emissive layer avoids hard pixelation when the mask is viewed at cinematic distance.
Shader complexity is the main budget concern. A costume that looks correct in isolation can still push a console target over its material permutation limit if every layer uses a unique shader. Studios that ship many armor sets usually consolidate to a small library of master materials, with per-instance parameters exposed through material instances. The fierce deity armor maps cleanly to that pattern: a master material for the bone or porcelain base, a master material for the cloth coat, and a master material for the metal accents, with the magical glow driven by an exposed emissive intensity.
Skeleton, rigging, and animation
Because the armor is typically layered on top of an existing character, rigging decisions mostly come down to skinning, cloth setup, and one or two cosmetic animations. A studio that ships many similar costumes usually maintains a hero skeleton that the entire costume library targets, and a smaller cosmetic skeleton for face, hair, and accessory motion. The fierce deity armor sits at the boundary: the helmet is part of the head skeleton, the coat is part of the cloth simulation, and the sword belongs to the weapon slot.
Skinning weight painting matters more than usual here because the coat’s hem and the helmet’s horns are visible during slow camera moves. Poor weights show up as a stretched silhouette at the shoulder seam or a flattened horn during head turns, and those are exactly the details that fan communities scrutinize. Most teams use automated weighting as a starting point, then hand-paint weights in the engine’s skinning tool, focusing on the shoulder seam, the neck seam, and the back of the helmet. Weight review is a separate gate: the model is rotated through the full range of head and torso motion and recorded for frame-by-frame inspection before the model is approved.
Animation is the second concern. The armor usually needs at least one signature idle, an equip animation, and a combat transition. Because the sword is a key part of the silhouette, the equip animation should not animate the weapon separately from the body; the sword has to come up with the right arm or appear in hand as part of the same motion. Splitting the equip into two animations is a frequent shortcut that breaks the read, and reviewers should be ready to flag it during the first combat test.
Player progression and unlock design
Gameplay design choices determine whether the armor is a memorable reward or a forgettable skin. The For additional context, classic Zelda approach makes the helmet a late-game collectible, often tied to a side quest chain that involves multiple NPCs, an exploration challenge, and a small narrative payoff. That structure works because the armor is rare, the player has to invest time, and the in-world reason for owning it is clear.
Studios building similar progression loops usually balance four variables: where the armor sits in the player’s progression curve, how the unlock is communicated, how the armor is integrated with the rest of the wardrobe, and how the unlock survives a save wipe or a port. The table below shows how those variables are typically decided.
| Decision area | Common choice for a hero costume | Risk to watch for |
|---|---|---|
| Position on progression curve | Late game, after the main story’s midpoint | Too late, players miss the visual payoff during key story beats |
| Unlock communication | NPC dialogue, map hint, optional journal entry | Hidden behind a missable trigger, frustrated players online |
| Wardrobe integration | Separate slot, dye or transmog support | Incompatibility with another equipped item forces a re-equip loop |
| Save and port handling | Account-bound or local-flag, depending on the platform’s policy | Lost unlocks after a cloud save restore, support tickets |
Player-facing systems should be tested with the armor actually equipped, not just owned. A common QA miss is to test the unlock flow without testing the moment of equip: the player opens the menu, selects the armor, and the game briefly stutters because the cloth simulation has to compile, the shader permutation has to load, or the equip animation has to be streamed. Those hitches are easy to fix before release and very expensive to fix after release, so a costume like this should be on the certification checklist for both the base build and the day-one patch.
Performance, optimization, and platform parity
A single costume can quietly consume a meaningful share of the frame budget on minimum-spec hardware, especially when the costume is the most detailed one in the wardrobe. The optimization pass should look at five areas: triangle count, material complexity, draw call contribution, animation cost, and memory footprint. The table below is a starting point for typical budgets, not a hard rule.
| Budget area | Mid-range PC or current console | Last-gen console or handheld | Mobile |
|---|---|---|---|
| Triangle count, full set | 40,000 to 80,000 | 20,000 to 40,000 | 10,000 to 20,000 |
| Texture memory, all channels | 30 to 60 MB | 15 to 30 MB | 8 to 16 MB |
| Material instances | 3 to 4 unique materials | 2 to 3, with shared master | 2, often merged |
| Draw calls per visible costume | 4 to 6 | 3 to 4 | 2 to 3 |
| Cloth simulation bones | 40 to 80 | 20 to 40, often replaced by vertex animation | Vertex animation only |
Platform parity is the most common reason a costume ships looking different on PC and console. The PC build often has higher triangle counts, larger textures, and more complex cloth, which makes reviewers see a sharper result than what ships on a base console. A studio that wants visual parity will set the LOD bias for each platform at the project’s first review, not after the first QA pass, because retroactively matching a high-end PC look on a base console is one of the most expensive art revisions a team can take on.
Shader permutation count is the second silent cost. Each material that uses a unique combination of feature flags creates a new permutation, and a costume library can easily push the project over the engine’s practical limit. The defense is to consolidate to a small number of master materials and expose per-instance parameters for the variations. A studio should track permutation count as a budget the same way it tracks triangle count.
Localization, accessibility, and compliance
A high-recognition costume has to be checked against localization, accessibility, and platform compliance before it ships, even if the asset itself is purely cosmetic. Three checks matter most.
First, naming and tooltip localization. The armor’s name and any descriptive text should fit within the project’s tooltip width on the smallest supported language build, and the description should not rely on lore that does not exist in the localized script. Translation review should happen on a real build, not in a spreadsheet, because context affects phrasing more than word count.
Second, accessibility. Color-blind safety is a common check for any item with a strong color identity, and a costume like the fierce deity armor usually pairs a high-contrast helmet with a neutral coat, which is a reasonable starting point. The bigger accessibility question is whether the magical glow is bright enough to trigger photosensitive reactions. Studios that ship magical items usually cap the emissive value, use a slow fade rather than a fast strobe, and provide a global accessibility option to reduce or disable high-frequency VFX.
Third, platform compliance. Most platform holders treat costumes as user-generated content only when players can author them. A studio-authored costume is part of the published build and is subject to the platform’s content review, including any region-specific guidelines. A costume that includes a culturally specific design element should be reviewed with the localization lead and, where appropriate, an internal cultural consultant before the asset is locked.
Production planning, ownership, and review gates
A hero costume is small enough that it usually lives inside a single content team, but it still touches enough disciplines that ownership has to be explicit. The typical ownership map looks like this:
- Concept art lead: Owns the reference board, the blockout silhouette, and the final concept sign-off.
- Character art lead: Owns the high-poly sculpt, retopology, bakes, and material authoring.
- Technical art lead: Owns the skinning review, the cloth or hair setup, and the shader permutation audit.
- Animation lead: Owns the equip animation, the signature idle, and the combat transition review.
- Gameplay or systems designer: Owns the unlock flow, the wardrobe integration, and the player-facing messaging.
- QA lead: Owns the equip-in-engine test, the performance pass, and the platform certification checklist.
Review gates keep the work moving. The blockout gate confirms the silhouette, the high-poly gate confirms the form, the retopo and bake gate confirms the production-ready mesh, the in-engine gate confirms the materials and lighting, the animation gate confirms the rig and motion, the optimization gate confirms the platform budgets, and the certification gate confirms that the asset is shippable. Skipping one of these gates is the most common reason a costume has to be revisited late in the project, when the cost of a change is at its highest.
Live operations, ports, and long-term maintenance
A costume like the fierce deity armor usually outlives the build it was first shipped in. That has consequences for how the asset is authored. The most useful long-term practices are: keep the source files in a versioned, named folder structure so a future port can rebuild the asset from scratch; keep the master materials in a shared library so a port can swap the platform’s render features without re-authoring the costume; keep the rigging in a version-controlled rig file so a port can re-target the skeleton without rebuilding weights from scratch; and keep the unlock data in a separate configuration file so a port can reproduce the player’s progression without re-implementing the quest chain.
Ports are where most of the long-term cost lives. A studio that ports a costume to a new platform should expect to revisit three things: the cloth or hair setup, because the new platform’s simulation budget is rarely identical to the original; the texture format and compression, because the new platform’s texture codecs have different visual artifacts at the same bitrate; and the certification checklist, because the new platform may have different content or accessibility requirements. Each of those revisits is much cheaper if the source files are organized for it, and very expensive if they are not.
Live operations are a separate concern. A costume that is part of a seasonal event, a battle pass, or a limited-time unlock has to be tracked through the live-ops schedule, with clear ownership of the event configuration, the unlock window, and the post-event archival. A studio that treats a hero costume as a one-time ship is often surprised by the live-ops work that follows, and a small amount of planning up front is the difference between a smooth event and a scramble.
Working with external vendors and outsourcing partners
Studios that ship many costumes often outsource the high-poly sculpt, the retopology, or the material authoring to an external vendor, and then bring the asset in-house for rigging, animation, and integration. The outsourcing handoff is where the most expensive mistakes happen, and a few practices reduce that risk. The brief should include the reference board, the engine and skeleton target, the triangle and texture budget, the master material list, the naming convention, and the file format. The handoff package should include the source files at the agreed subdivision levels, the baked maps, the material instances, and a rendered turntable that matches the project’s lighting setup.
Review should happen at the same gates as an in-house asset, with the same acceptance criteria. The most common outsourcing failure is a costume that looks correct in the vendor’s DCC but breaks at the in-engine gate, usually because the vendor and the studio used different lighting presets or different skeleton targets. A short in-engine review at the blockout and the high-poly stages catches most of those issues before they become rework.
Studios that work with several vendors should standardize the handoff package so a costume can move between vendors without a re-brief. The package is also the easiest way to keep a costume library consistent across multiple projects, because the same package works for a sequel, a remaster, or a port.
Frequently asked questions
What makes the fierce deity armor a useful GameDev case study?
The armor combines hard-surface and soft-surface modeling, a strong silhouette that has to read at multiple viewport sizes, a recognizable design that has been reinterpreted across several hardware generations, and a player progression loop that balances rarity, narrative payoff, and wardrobe integration. That range of concerns makes it a practical reference for a studio that wants to evaluate a pipeline, a rig, or a progression design without committing to a full title.
How do studios decide between a full transformation and a single equippable piece?
The decision usually comes down to the game’s wardrobe system and the role the costume plays in progression. A full transformation works when the game has a small character roster, a tight mask or transformation mechanic, and a moment in the story that justifies replacing the player character. A single equippable piece works when the game has a layered wardrobe, a transmog or dye system, and a progression curve that favors frequent small rewards over a single large one. Both approaches are valid, and the choice should be made at the project’s design pillar stage, not during art production.
What is the typical triangle budget for a hero costume in a modern PBR engine?
Budgets vary by platform, but a reasonable starting range is 40,000 to 80,000 triangles for a mid-range PC or current console target, 20,000 to 40,000 for a last-gen console or handheld, and 10,000 to 20,000 for a mobile build. These are starting points, not hard rules, and a project should set its own budget at the first review and audit the actual cost at the optimization gate.
How is the magical glow on the mask usually implemented?
The most common approach is a PBR base material with an emissive channel masked to the cracks or eye sockets of the mask, combined with a subtle bloom pass in the post-process stack. The emissive value is usually low and the bloom is usually a small radius, so the glow reads from a distance without blowing out the rest of the frame. Studios that ship many magical items typically cap the emissive value and provide an accessibility option to reduce or disable the effect.
What is the difference between a master material and a material instance for a costume?
A master material is a shared shader that defines the features and parameters a costume can use. A material instance is a per-asset configuration that exposes the master’s parameters with specific values, such as a particular base color, normal map, or roughness curve. The pattern lets a studio ship a small number of shaders while still having per-costume variation, and it is the most common defense against runaway shader permutation counts.
How do studios handle the coat silhouette during crouch or mount animations?
There are three common approaches. The first is a low-cost proxy mesh with normal-mapped folds, used when the platform cannot afford a full cloth simulation. The second is a tuned cloth simulation with a stiffness curve that keeps the hem from clipping the legs, used when the platform can afford it and the project can tolerate the occasional artifact. The third is hand-keyed vertex animation, used when the team wants full control and is willing to spend the animation time. Each option has a real cost, and the choice usually depends on the platform budget and the project’s tolerance for cloth artifacts.
What is the most common reason a costume has to be reworked late in a project?
The most common reason is a skipped review gate, usually the in-engine gate or the optimization gate. A costume that looks correct in a DCC can still fail in the engine because the lighting setup is different, the skeleton target is different, or the platform budget is tighter than expected. The rework is much cheaper if the gate is run on time and the team has the source files organized for a quick revision.
How should a studio prepare a hero costume for a future port?
The most useful practices are to keep the source files in a versioned, named folder structure; to use the project’s shared master materials rather than custom shaders; to keep the rigging in a version-controlled rig file; and to keep the unlock data in a separate configuration file. Those four practices make a port much cheaper, because the new platform’s team can rebuild the asset from scratch without re-implementing the design or the progression.
Do fan recreations and mods affect how a studio should design an official costume?
They do, mostly as audience intelligence. A studio that knows which features the community treats as canonical, such as the helmet horn geometry or the sword proportions, can prioritize those during the silhouette test and the review gates. Fan recreations are not a design source, because the studio cannot use third-party work, but they are a useful signal about which details the audience will measure most closely.
What is the role of QA in a hero costume project?
QA owns the equip-in-engine test, the performance pass, and the platform certification checklist for the costume. The equip-in-engine test confirms that the asset can be equipped without a hitch on the minimum-spec target. The performance pass confirms that the costume meets the project’s triangle, texture, draw call, and shader permutation budgets. The platform certification checklist confirms that the costume is shippable on each target platform, including any region-specific guidelines. Skipping any of those checks is the most common reason a costume ships with a visible issue.


Leave a Reply