
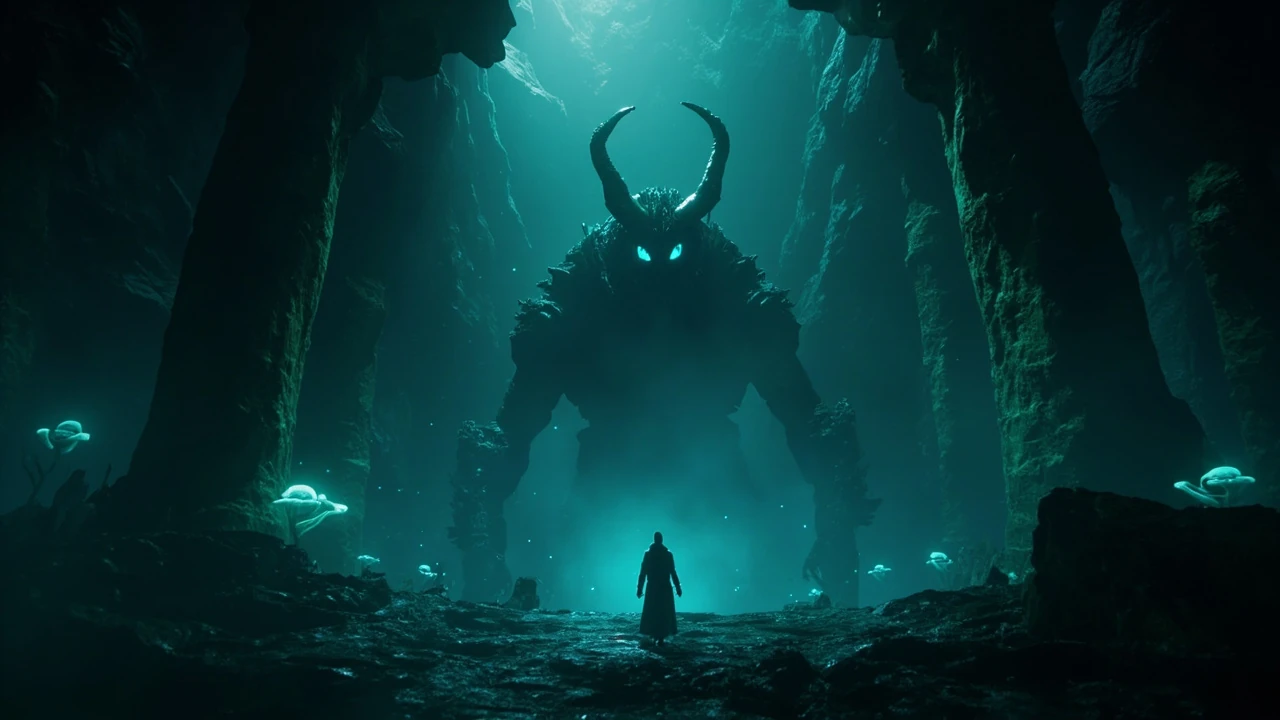
Hollow knight boss order that respects how the game actually teaches you
Picking a hollow knight boss order is less about memorizing a checklist and more about reading what each fight is trying to teach. Hollow Knight gives you almost no signposting, which is why new players often wander into a wall like Hornet in Greenpath or the Mantis Lords in the Fungal Wastes long before they are ready. The route below treats progression as a sequence of skill gates rather than a fixed list, which is the only honest way to discuss a game that is famously non-linear.
You can wander almost anywhere in Hallownest from very early on, and that freedom is part of the design. A wiki-style article may claim a strict sequence, but a careful walkthrough needs to acknowledge optional paths, optional bosses, and the few hard gates that actually block forward progress. With that in mind, the recommended order below mixes the natural exploration path with the rough difficulty curve, so you are not just running a map in a straight line.
If you are a new player, treat the order below as a default route, not a rule. The two things that matter most are which abilities you have unlocked and how comfortable you are with the combat language of the game: dash timing, downward strikes, healing on demand, and reading telegraphs. Once those clicks, the rest of the bosses become a question of patience rather than raw skill.
How Hollow Knight’s progression actually works
Hollow Knight does not give you a quest log, an arrow on the map, or a recommended level. The progression system is built from a small set of layered gates, and understanding those layers is the fastest way to reason about any boss order.
Three layers of progression in Hallownest
- Vertical exploration. The map opens from the center outward and downward, with optional vertical shortcuts in every region. A new ability like Mantis Claw or Monarch Wings does not just give you a new attack; it unlocks new rooms you can stand in, which then changes which bosses are reachable.
- Optional character upgrades. Masks, Vessel fragments, Charm Notches, Pale Ore, and Geo caches raise your survivability and damage ceiling. None of them are required, but they quietly change the difficulty of every later fight.
- Narrative unlocks. A small number of bosses, mini-bosses, and story NPCs gate new systems: the Dreamers gate the ending, the Troupe Master unlocks the Grimm Troupe content, and the Hollow Knight itself is the final act of the main story.
Those three layers matter because they explain why two players can follow the same route and have completely different experiences. One player walks into Hornet with five masks and the Vengeful Spirit spell; another walks in with nine masks, Quick Slash, and Monarch Wings. Both are following a “natural” hollow knight boss order, but their fights feel nothing alike.
What the game does and does not gate
Only a handful of elements in Hollow Knight are truly hard-gated by progression:
- The City of Tears entry from the Fungal Wastes requires a simple ability you already have, so it is soft-gated only by comfort with platforming.
- The Deepnest entrance is available early but its mid-bosses are usually skipped on a first run because of the difficulty spike.
- The Kingdom’s Edge and the Colosseum assume you already have several movement abilities.
- The Dreamers and the final boss path assume you have already invested in Charms, masks, and spell capacity.
Everything else is a soft gate: technically reachable, but punishing if you arrive under-equipped. A good hollow knight boss order respects those soft gates by suggesting region-by-region pacing rather than a rigid checklist.
Recommended hollow knight boss order for a first playthrough
The route below is written for a new player who wants a sensible default without skipping optional content. It is also the route most commonly recommended in community guides, including the general progression path outlined on the wikiHow breakdown of Hollow Knight bosses, which starts with False Knight, then Gruz Mother, and moves through Greenpath, the Fungal Wastes, Soul Sanctum, the Royal Waterways, Ancient Basin, Crystal Peak, and the Queen’s Gardens, with the final boss in the Forgotten Crossroads.
Within each region, there is usually one “main” boss and a small number of optional encounters. The table below maps each major region to its main story boss, key optional bosses, and the practical reason the region fits where it does in the route.
| Step | Region | Main boss | Key optional bosses | Why this region fits here |
|---|---|---|---|---|
| 1 | Forgotten Crossroads | False Knight | Gruz Mother, Brooding Mawlek (optional) | First real movement and combat tutorial; forgiving arena and patterns. |
| 2 | Greenpath | Hornet (Protector) | Moss Charger, Massive Moss Charger | Adds dash timing and downward pogo to your toolkit; enemy types are slower. |
| 3 | Fungal Wastes | Mantis Lords | Brooding Mawlek (alt), Mushroom Ogres | Tests multi-target combat and spacing; gates the City of Tears. |
| 4 | City of Tears / Soul Sanctum | Soul Master | Watcher Knights, Dung Defender (later) | Introduces vertical arenas, spell pressure, and Soul management under stress. |
| 5 | Royal Waterways | Dung Defender | Flukemarm, optional mini-bosses | Slower, tankier fights; rewards patient healing and Charm setups. |
| 6 | Deepnest | Herrah the Beast | Mantis Petra (optional), Nosk | First real difficulty wall; encourages Charm experimentation. |
| 7 | Ancient Basin | The Broken Vessel | Lost Kin (Steel Soul), optional encounters | Tests everything learned so far; tight arena and aggressive patterns. |
| 8 | Crystal Peak / Resting Grounds | Crystal Guardian area + Dreamers (Monomon) | Crystal Guardian, Enraged Guardian | Combines platforming, crystals, and dream content for the third Dreamer. |
| 9 | Queen’s Gardens | Traitor Lord | Watcher Knights (alt), optional mini-bosses | Heavy crowd-control fight; tests Charm builds and timing. |
| 10 | Kingdom’s Edge / Forgotten Crossroads | Final boss: The Hollow Knight or Radiance | Nightmare King Grimm, White Defender, Grey Prince Zote | Endgame difficulty; assumes full Charm selection, several masks, and practiced movement. |
This is a default route, not the only route. If a particular boss frustrates you, the game quietly expects you to leave, explore somewhere else, and return later with more masks, a better Charm loadout, or new abilities. That loop is part of the design language.
Early-game boss order: the first four fights
The first four bosses are where the game either clicks for you or doesn’t. They teach the core combat verbs one at a time, and almost every later encounter builds on what they introduce. Skipping them is technically possible, but you will feel the gap in your timing in much harder fights.
False Knight (Forgotten Crossroads)
False Knight is the first real boss and the first real lesson: attacking is cheap, but healing is a commitment. The fight is built around windows where the boss winds up an attack, you heal, and you punish. New players often lose here not because of damage, but because they try to heal during a jump slam they thought was safe. Treat the early minutes of this fight as a study in waiting for clear openings.
Gruz Mother (Forgotten Crossroads, southwest)
Gruz Mother is more about positioning than reflexes. The arena is small, the boss drifts, and the real threat is the swarm of Gruzzer adds that flood in during phase two. If you clear the adds quickly, the fight becomes trivial. If you focus the mother, you will get swarmed. This is the first place the game subtly tells you that sometimes the correct target is not the boss bar.
Hornet (Greenpath)
Hornet is the first “real” test, and she is harder than anything before her for a reason. She forces you to learn:
- Jump-pogo on her needle throws for free damage.
- Reading a three-hit combo instead of a one-hit slam.
- Using the environment to heal when the arena is not cooperating.
Her attack patterns are readable on purpose. Once you internalize the rhythm, almost every other boss in the game becomes a variation on the same idea: wait, punish once or twice, get out.
Mantis Lords (Fungal Wastes)
The Mantis Lords are the first encounter that genuinely punishes greed. They are fast, they combo, and they respawn in waves. A common mistake is to keep attacking the same Lord and let the other two flank you. The fight is built around the spacing between the three of them, and a long sword reach or Quick Slash makes it dramatically safer. If you can clear this fight without losing a mask, you are in good shape for the rest of the game.
Mid-game boss order: from the City of Tears to the Dreamers
The mid-game is where Hollow Knight’s pace opens up. You can, in principle, bounce between four or five regions at once, and the order becomes more about which set of abilities you want next than about which boss is “next.”
Soul Master and Soul Tyrant (City of Tears / Soul Sanctum)
The Soul Master introduces a new lesson: managing Soul under pressure. His teleports and orb spam punish you for being stationary, and his downward slam punishes you for being too greedy. Players who did not invest in spell capacity before this fight will feel the lack of Vessel fragments. A simple build of Shaman Stone, Soul Catcher, and a basic ranged spell turns the fight from a slog into a clean execution test.
Dung Defender (Royal Waterways)
The Dung Defender is a slow, deliberate fight that rewards patience. His rolling pattern has a clear tell, his arena is large, and the real trick is to use the pillars for line-of-sight. A common mistake is to chase him across the arena and eat a hit. Sit in one zone, force him to come to you, and the fight becomes a Charm showcase.
Watcher Knights (City of Tears, Watcher’s Spire)
Watcher Knights is a popular stumbling block because it is essentially a horde boss with a long, escalating timer. The mechanics are not complicated individually, but the volume of knights in later waves is. Builds that focus on Quick Slash, Mark of Pride, or spell spam dramatically change the timing. This is the first place where optimizing your Charm loadout pays for itself, and where reading the wiki’s Charms page is a more useful time investment than a tenth attempt at the same approach.
Nosk (Deepnest)
Nosk is more horror set-piece than mechanical challenge, but that is its job. The fight itself is a simple arena with adds and a few slam attacks, and the difficulty is mostly about staying calm when the arena fills with noise. The first time the fake Knight drops the disguise is, for many players, the moment Hollow Knight’s atmosphere really lands.
Herrah the Beast (Deepnest, Distant Village)
As one of the three Dreamers, Herrah is a mandatory story boss if you want to reach the final act. Her pattern is fair but relentless, and the real trick is positioning. Stand too close and her spinning attack eats half your masks. Stand too far and her dash closes the distance. The fight rewards a mid-range stance and good Charm selection, and is a useful barometer for if you are ready to take on the harder Dreamers.
The Broken Vessel (Ancient Basin)
Broken Vessel is the second Dreamer and the test of everything you have learned so far. Its attacks are fast, its arena is small, and the corpse of a former Knight Vessel in the background is doing a lot of narrative work. Mechanically, the fight is a clean execution test: dash through the lunge, hit twice, jump out before the slam. If you cannot clear this fight consistently in four or five attempts, you are not under-skilled; you are likely missing a key upgrade like extra masks, a stronger Nail, or a damage Charm.
Late-game boss order: the third Dreamer and beyond
By the time you are approaching the third Dreamer, you should already have a build you trust, an ability set you can switch on the fly, and a sense of which fights you still need to clean up for completion.
Traitor Lord (Queen’s Gardens)
The Traitor Lord is a wall for many players because of the fight’s pacing. He charges, he leaps, he spawns adds, and the arena is small. The key is to treat him like a multi-phase fight: clear the adds in phase one, stay aggressive in phase two, and only attempt phase three with a Soul stockpile ready. This is also a fight where a defensive Charm build with Quick Slash, Mark of Pride, and Stalwart Shell can outperform a “pure damage” build.
Monomon the Teacher (Resting Grounds, via Crystal Peak)
Reaching Monomon is more of a navigation puzzle than a combat one. The actual fight is a short, scripted encounter that gates the next step of the story rather than testing your mechanics. By the time you reach this point, your Charm selection and your comfort with dash-cancel healing are the only things still being graded.
White Defender, Grey Prince Zote, and the colosseums
These optional encounters are essentially end-game proficiency tests. They are not required to finish the main story, and they are not the right place to learn the game. If you cannot clear the Traitor Lord, attempting the colosseums is a guaranteed frustration loop. The wise move is to leave them for a second playthrough or a high-mask build.
Nightmare King Grimm
Nightmare King Grimm is the hardest boss in the base game for most players and a major difficulty spike that the game does not gate behind any progression wall. The first time you fight him, you will lose quickly, and that is by design. The fight is a study in micro-canceling your own inputs: every dash, every heal, every swing has to be deliberate. If you have not practiced Charm switching mid-fight, this is the encounter that will force you to learn.
The Hollow Knight and the Radiance
The final boss path depends on how you finish the game:
- Ending A reaches The Hollow Knight directly, a multi-phase fight that mixes the infection cinematic with platforming, swordplay, and beam dodging.
- Ending B requires the Dreamers, the Void Heart, and reaching The Radiance, a boss that is often considered the true test of the entire game.
Either way, by this point the question is no longer “which boss comes next” but “can I execute my build under sustained pressure for three to five minutes.”
Charm and build choices for each boss stage
A hollow knight boss order only really works if you also have a default Charm loadout in mind for each stage of the game. The table below is not a hard rule, but it matches what most experienced players end up running by the time they hit each major boss.
| Progression stage | Default offensive charms | Default defensive charms | Notes |
|---|---|---|---|
| Early game (False Knight, Gruz Mother) | None required | Wayward Compass, Gathering Swarm | Focus on map and resource collection; combat is a tutorial. |
| Greenpath and Fungal Wastes (Hornet, Mantis Lords) | Quick Slash, Mark of Pride, Shaman Stone | Stalwart Shell, Quick Focus | Mix damage and survivability; Quick Focus is the most underrated Charm in the game. |
| City of Tears and Royal Waterways (Soul Master, Dung Defender) | Shaman Stone, Soul Catcher, Spell Twister | Stalwart Shell, Quick Focus | Spell builds shine here; the arenas favor ranged pressure. |
| Deepnest and Ancient Basin (Nosk, Herrah, Broken Vessel) | Quick Slash, Mark of Pride, Strength | Stalwart Shell, Quick Focus, Dashmaster | Mix of close-range damage and healing; mobility is critical. |
| Late game (Traitor Lord, Dreamers, Hollow Knight) | Quick Slash, Mark of Pride, Shaman Stone, Spell Twister | Stalwart Shell, Quick Focus, Shape of Unn | Optimized builds with all movement and healing Charms unlocked. |
| Endgame (Radiance, Nightmare King Grimm) | Quick Slash, Mark of Pride, Shaman Stone | Stalwart Shell, Quick Focus, Shape of Unn, Dashmaster | Specialized setups; the “best” build is often the one you have practiced the most. |
Charms in Hollow Knight are flexible on purpose. The game does not lock you into a build the way a traditional action-RPG might, and almost every recommended setup in any guide is just one of several viable options. The real value of a Charm is the muscle memory you build while using it, which is why a player who only ever uses one or two Charms will often outperform a player who keeps switching.
Common pitfalls when following any boss order
Most frustration with a hollow knight boss order comes from a small set of recurring mistakes. Spotting them early saves hours of reset attempts.
- Chasing the boss across the arena. Some bosses, like Dung Defender, are designed for the player to hold ground. If you keep chasing, you eat hits you could have avoided.
- Healing during a telegraphe. The number one cause of lost masks in early game is healing during a wind-up animation that the player assumed was a recovery animation. When in doubt, do not heal.
- Ignoring the adds. A handful of fights, including Gruz Mother and the Mantis Lords, are designed around adds. A pure boss-damage strategy will lose to a clear-and-punish strategy.
- Skipping the colosseums. The colosseums and Pantheons are excellent practice but are not the right place to start. Coming back to them with a full Charm set is more efficient than struggling through them on a four-mask build.
- Forgetting Geo caches. A boss that is one mask too hard is often a boss that you arrived at with one mask too few. The difference is usually a ten-minute side trip to a nearby cache.
None of these pitfalls are obvious until you have already lost the run that mattered. Treat them as a checklist the first time you walk into a new boss arena.
How to adapt the order for a second playthrough
If you are starting a second save, the order changes in two meaningful ways. First, you can use the early-game Geo path to buy a Mark of Pride, Quick Slash, or both before leaving the Forgotten Crossroads, which softens almost every early boss. Second, you can route through the colosseums in the mid-game instead of saving them for the end, which is a more efficient way to practice builds because the difficulty curve is more controlled.
For a Steel Soul (permadeath) run, the order has to be even more conservative. The general rule is to do every optional mini-boss and cache before pushing into a new region, because death is a save wipe rather than a Geo tax. Most Steel Soul players treat the early-mid game order as a tight loop through Greenpath, the Fungal Wastes, and the City of Tears, and only push into Deepnest once they have at least eight masks and the Shade Cloak.
How a hollow knight boss order applies to other Metroidvania design
For readers interested in how this kind of progression is built, a hollow knight boss order is a useful case study in soft gating. Hollow Knight never tells the player to go to a region in a fixed order, but the difficulty curve and the ability gates create a strong default path. That design pattern shows up in many of the most popular Metroidvanias, from the layered progression of the Souls series to the more recent walkthrough-style releases like the production-minded guide to Sekiro’s progression and boss design. Looking at how different games solve the same problem is one of the better ways to understand why some non-linear games feel like they are leading you by the hand, and others feel like they are testing whether you can think like a designer.
It is also a useful contrast with games that lean on a more guided map. The walkthrough-driven flow of releases like the Pokemon Legends Z-A walkthrough shows what a more structured progression model looks like, and the difference is instructive. Hollow Knight’s “you can go anywhere, but the game is teaching you to know where to go” approach is one of the reasons the boss order conversation exists at all, and it is a useful reference point for anyone thinking about how to design non-linear difficulty curves.
Validation: how to know you are ready for the next boss
Before moving to the next region in the recommended order, run through this short checklist. If most of the answers are no, you are not under-skilled; you are likely missing a piece of progression or a Charm.
- You can clear the previous region’s boss with two or fewer masks lost on a typical attempt.
- You have at least one extra mask beyond what you had when you first arrived in the previous region.
- You have explored at least one optional area in the previous region for Geo, Mask Shards, or Vessel fragments.
- You have unlocked or are about to unlock a new movement ability.
- You can dash-cancel a heal without thinking about it.
If most of those are yes, you are ready to push. If most are no, spend another hour in the current region. The game is built around that loop, and fighting it is the single most common mistake new players make.
Frequently asked questions
What is the easiest boss in Hollow Knight?
False Knight is the intended first real boss and is widely considered the easiest. Its patterns are slow, the arena is forgiving, and it teaches the core idea of waiting for a clear opening before committing to an attack. Gruz Mother is also very easy if you clear the adds quickly, and is often a good second fight for players still getting used to the combat language.
What is the hardest boss in Hollow Knight?
For most players, Nightmare King Grimm and The Radiance sit at the top of the list. Nightmare King Grimm demands precise input chaining under pressure, while The Radiance combines long phases, multiple attack patterns, and a final platforming phase. The Pure Vessel fight in the Godmaster content is also widely considered a top-three difficulty spike. The boss that feels hardest in practice, though, is often the one the player is least practiced with.
Can I fight the final boss early?
Technically you can reach the final boss’s area, but the path is gated by abilities and by the Dreamers. You cannot trigger the ending without first defeating the three Dreamers and, in the case of the Radiance ending, obtaining the Void Heart. The game allows exploration but it does not allow skipping the story sequence.
Is there a fixed hollow knight boss order in the game itself?
No. Hollow Knight never tells the player a required boss order, and almost every boss can be reached from very early in the game if you are willing to take the punishment. The recommended order is a community construct built around the soft gates, the difficulty curve, and the natural flow of unlocks, not a hard rule enforced by the game.
Should I fight optional bosses like Grimm or the colosseums on a first run?
Most players should treat the Grimm Troupe and the colosseums as post-game content. The difficulty jump is significant, and the rewards are Charms and completion percentage rather than story progression. A first run is usually smoother if you focus on the main path and return to the optional bosses on a second playthrough or after a high-mask build.
How many masks do I need before the late game?
There is no official minimum, but a comfortable late-game build is usually around nine to eleven masks with all movement and healing Charms unlocked. Players with fewer masks can still clear the game, but they will need to be more disciplined about healing windows and Charm selection. A good rule of thumb is to push into the late game only when the previous region’s boss feels easy, regardless of the mask count.
Do I need to play the Grimm Troupe to finish the story?
No. The Grimm Troupe is a self-contained DLC content cycle that runs in parallel with the main story. You can complete the main ending without ever touching it, and you can also complete the Grimm Troupe’s storyline without affecting the main ending. They are designed to be independent.
What is the difference between a hollow knight boss order and a wiki checklist?
A wiki checklist usually lists every boss in a fixed order and treats them as equivalent. A boss order is more about which fights are useful when, given the abilities and Charms you have at that point in the game. For most players, a thoughtful boss order is more useful than a strict checklist because the game does not actually require a fixed sequence.
How long does a first playthrough take if I follow a sensible boss order?
A first playthrough that follows a sensible boss order and clears most of the main content usually lands somewhere between 25 and 40 hours, depending on how much optional exploration you do. Players who skip optional bosses and focus on the critical path can finish in closer to 20 hours, while completionists who clear the colosseums, the Pantheons, and the Grimm Troupe can easily double that.
What is the best Charm build for a first-time player?
For a first playthrough, a balanced build of Quick Slash, Mark of Pride, Stalwart Shell, and Quick Focus covers most situations. Add Shaman Stone once you start relying on spells, and add Shape of Unn once you have access to it. Avoid stacking too many damage Charms early; the gain is small and the loss in survivability is significant.





Leave a Reply