
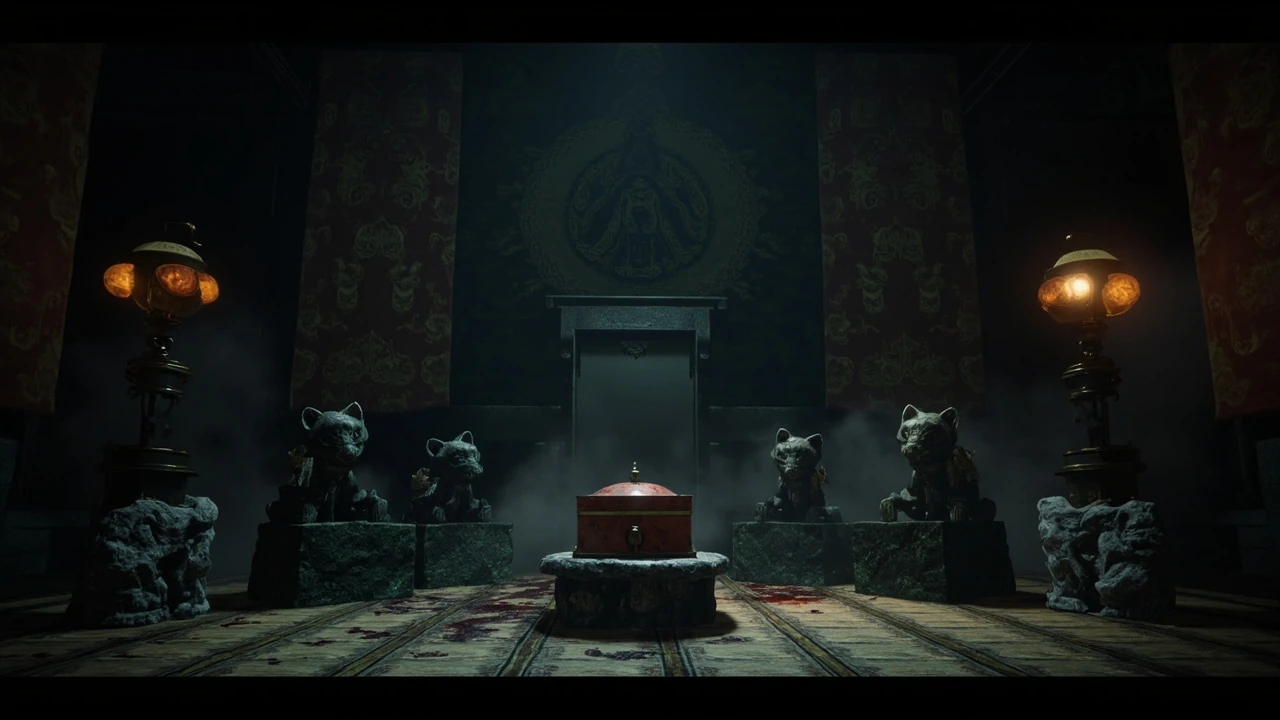
Silent Hill f mural puzzle: a step-by-step walkthrough of the Dark Shrine
The Dark Shrine chapter of Silent Hill f opens with no map and no breadcrumbs, so most players reach the first room, see a tall mural flanked by two tapestries, and immediately feel the pressure of an unfamiliar layout. The room is part shrine, part maze, and part folklore puzzle box, and it teaches the chapter’s two core verbs very quickly: look at artwork for clues, and use Focus Power to open the doors that are not drawn. This walkthrough covers the full sequence of rooms, stat interactions, secret passages, crest pickups, and the emblem placement that finishes the Silent Hill f mural puzzle without skipping the optional notes that feed the Tsuneki family lore trophy.
The path described here is based on the verified walkthrough layout for the Dark Shrine. It assumes a first-time player who has not yet opened any of the side chambers, who has Focus Power available, and who wants to collect every scroll, crest, and note in the same run.
What this walkthrough actually solves
Behind the language of “puzzle,” the Dark Shrine sequence is a chained set of sub-tasks. You have to learn how to read fox statues, follow a stat’s eye direction, retrieve three crests from boxes, and then arrange two bird emblems and a fox emblem on the final mural. Every previous step unlocks the next one, so skipping a chest or a side room generally means a later door will not respond. The chapter rewards careful observation more than reflex combat, even though a Drum Monster and several torture-chamber enemies do appear along the way.
Before you start: prerequisites and core mechanics
The Dark Shrine does not introduce any new combat mechanics, but it does lean on a small set of systems that you need to have working before the first room.
- Focus Power must be charged. It is used to reveal and open the bloody walls that hide secret passages. If the meter is empty when you reach a stained wall, the puzzle stalls.
- Combat readiness matters even in puzzle rooms. The fox statue chamber and the back rooms both contain respawning enemies, and the box with the final crest will not open until the room is clear.
- There is no map in this chapter. The game explicitly tells you to navigate by landmarks, so the descriptions below are written as a sequence of visible objects rather than a grid.
- Notes are tracked, not collected passively. Several pickup notes are tagged as part of the “Truth About the Tsuneki Family” trophy, and the game only flags them when read in context.
If you are entering the Dark Shrine for the first time, treat the area as a linear corridor with side branches. The branches are the parts that contain the crests, the notes, and the trophy pickups, and the corridor is the part that always moves you forward.
Room 1: the mural hall and the first fox statue
The first room you enter after the save shrine contains the mural that gives the puzzle its name. A large wall painting sits between two tapestries, and looking at it triggers the first prompt. The mural is your north star for the rest of the chapter, because every later room references either its color palette, its emblems, or its bird-and-fox imagery.
From the entrance, take the left door. You will arrive in a chamber with four large fox statues. Walk to the statue in the back left and inspect it. Pulling out the shard gives you the first ornate scroll, and as you do, the statue rotates on its plinth. Its eyes begin to glow, and the direction it faces becomes the next door you need.
On the small altar in the middle of this chamber you will also find the note Doctor’s Record, which the game flags as part of the “Truth About the Tsuneki Family” trophy progression.
| Action | Where | Result |
|---|---|---|
| Inspect back-left fox statue | First statue chamber, rear-left plinth | Ornate scroll; statue turns and its eyes glow |
| Read altar note | Small central altar | Doctor’s Record (Tsuneki trophy) |
| Note door direction | Statue’s facing after rotation | Defines the next corridor to take |
Corridor of chambers: the Hunting Dog, the first crest, and the Maid’s Note
Following the statue’s direction takes you through the left door into a corridor lined with several small chambers. The puzzle logic in this corridor is “read the room before you fight,” because some chambers hold pickups and one holds a hidden passage.
- First chamber on the right: open it to pick up the Omamori Hunting Dog. The other chambers in this stretch contain consumables rather than key items, so do not waste resources fighting in them unless you need to refill.
- Straight ahead at the next altar: open the lacquered box on the altar and take the Black Sparrow Crest. This is the first of the three crests you will eventually place on the mural.
- Chamber to the left of the altar: read the Maid’s Note on the table. This is the second of the four notes required for the Tsuneki trophy, and it is easy to miss because the chamber looks empty at a glance.
- Chamber to the right of the altar: use Focus Power on the bloody wall to open a secret passage, then take the door on the right. This path loops back toward the mural chamber, which lets you pick up the next scroll without backtracking through enemies.
The corridor section is a useful test of the chapter’s pacing. You are being asked to clear small rooms, pick up text, and notice a wall that is stained rather than drawn. The reward is the Black Sparrow Crest, and the lesson is that Focus Power is your pass to the back half of the map.
Returning to the mural: the second scroll and the bloody passage
Once you circle back to the mural chamber, the second ornate scroll sits on a table near the save shrine. Take it, then move to the adjacent door and use Focus Power to turn the bloodstained wall into a passage. The wall behaves like a hidden transition: it only animates when the meter is available, and once it opens it stays open for the rest of the chapter.
Just inside the new passage, in front of the next fox statue, you will find another Maid’s Note. This is the third note the game counts toward the Tsuneki trophy progression. Treat it as a soft checkpoint: if you have read three notes by this point, the trophy is on track.
The torture chamber detour and the letter pickup
The hidden passage leads into a torture chamber, which functions as a small combat arena. The room is not optional, and it is also not a dead end. You walk through it, clear or evade the enemies, and exit on the opposite side. On the way out, keep an eye on the columns. Lying near one of them is the Letter from a Strict Mother, the third of the four Tsuneki notes.
| Note pickup | Approximate location | Trophy count |
|---|---|---|
| Doctor’s Record | First fox statue chamber altar | 1 of 4 |
| Maid’s Note (first) | Chamber left of the first altar | 2 of 4 |
| Maid’s Note (second) | Front of the fox statue past the bloody passage | 3 of 4 |
| Letter from a Strict Mother (first) | Near a column in the torture chamber | 3 of 4 |
| Letter from a Strict Mother (second) | Beside the right-hand door after the second crest | 4 of 4 |
The four-column room: reading wall hangings, not just doors
Exiting the torture chamber drops you into the chapter’s most disorienting space. It is the same fox statue chamber you visited earlier, but it has been reconfigured: there are now four fox statues, four columns, and four doors, each flanked by a wall hanging. Picking the wrong door sends you into a torture chamber with two enemies that you must defeat before you can leave.
The door you want is the one flanked by a red hanging on the left and a green one on the right. Open it, and you will face a Drum Monster in the room beyond. Defeat the monster, then use Focus Power again to open the next set of hidden doors. The room is designed to test the rule you have been learning all chapter: combat first, then Focus Power, then door.
- Wrong door: torture chamber with two enemies, then a forced retreat to the four-column room.
- Right door (red left, green right): Drum Monster encounter and the second crest.
- After combat: Focus Power reveals a hidden exit you would otherwise walk past.
Altar with the White Sparrow Crest
Through the cleared door sits another altar, this one with a box that holds the White Sparrow Crest. This is the second of the three crests needed for the final mural. The third crest is reserved for the very end of the chapter, so for now you have two crests in your inventory and a clear path back to the mural chamber.
Back in the mural room, pick up the third ornate scroll from the side table. You now have all three scrolls, and the room’s function changes: it is no longer a transit space. It is the staging area for the puzzle’s final input.
Return to the fox statue chamber: the third fox and the third crest
Head through the right-hand door to re-enter the fox statue chamber, which now feels more crowded and more unsettling than before. Beside the right-hand door you will find the last Letter from a Strict Mother, completing the four-note requirement for the Tsuneki trophy.
From the entrance of this chamber, head left and interact with the second fox statue from the left. Remove the shard, take the ornate scroll, and the statue will rotate to face the next door, exactly as the first one did at the start of the chapter. Follow the door it now faces.
Before you can open the box with the final crest, the room has to be clear of enemies. The game soft-locks the box behind a short combat encounter, then triggers a cutscene that explains the riddle on the mural. This is the moment the Silent Hill f mural puzzle actually becomes a single, defined task.
The final mural riddle and the solution
After the cutscene, return to the mural and read the riddle the chapter leaves you with. The text on the mural states:
“The black bird wants to take the white bird with it. The white bird resists. The fox proudly leads his followers, unaware of the two birds in conflict. Prove your intent with the three crests. Show what lies deep in your heart. Follow the line of foxes. Offer the crests and reveal your soul.”
The riddle is a small piece of folklore compression, and it lines up with the artwork on the mural itself. The left side of the mural shows a single fox marching proudly in front of a palanquin. The right side shows two foxes fighting. The birds are the Black Sparrow and the White Sparrow crests you have been carrying, and the fox emblem is the reward for completing the chain.
| Mural section | Imagery | Emblem to place |
|---|---|---|
| Right side, left fox | Fox locked in combat | Black bird (Black Sparrow Crest) |
| Right side, right fox | Fox locked in combat | White bird (White Sparrow Crest) |
| Left side, in front of palanquin | A single fox marching proudly | Fox emblem (third crest) |
Place the white bird with the right fox and the black bird with the left fox on the right-hand side of the mural. Place the fox emblem in front of the palanquin on the left-hand side. The riddle’s final line is literally a placement instruction: “Follow the line of foxes” means lay the bird emblems along the row of fighting foxes on the right, and “Offer the crests” means each of the three crests has a specific seat.
When the three emblems are seated, the mural reacts, the door you need to leave the room opens, and the chapter resolves.
Optional pickups and what they actually unlock
The Dark Shrine is unusually generous with side pickups, and several of them feed trophy or achievement progress. None of them are required to solve the Silent Hill f mural puzzle, but missing them is the most common reason a walkthrough run falls short of 100% completion.
- Ornate scrolls (3 total): one from the first fox statue, one from the table near the save shrine after the loop, and one from the third fox statue in the final chamber. They are flavor text in the short term, but they are part of the chapter’s progression chain.
- Crest boxes (3 total): Black Sparrow Crest on the corridor altar, White Sparrow Crest in the Drum Monster room, and the third crest behind the final combat encounter.
- Omamori Hunting Dog: a charm in the first side chamber that improves your encounter options rather than your puzzle path.
- Notes for the Tsuneki trophy (4 total): Doctor’s Record, two copies of Maid’s Note, and two copies of Letter from a Strict Mother. The trophy only requires four, and the game includes five across the chapter, so a single missed read still leaves you with a full set.
Common failure modes and how to avoid them
Most players do not actually fail the mural puzzle itself. They fail one of the small prerequisites that the chapter assumes but does not announce. The walkthrough below is the way to recover when the mural refuses to accept the emblems or the room refuses to give you the third crest.
- The bloody wall does not animate. Focus Power is empty. Back away from any combat, let the meter recharge, and try again.
- The four-column room loops back into a torture chamber. You picked the wrong door. The correct door has a red hanging on the left and a green one on the right. The other three doors are all punish doors that drop you into an enemy encounter.
- The third crest box is locked. The room still has enemies alive. Clear the room fully, including the second wave that can spawn after the first stat is removed, and the box will open.
- The mural does not accept the emblems. Check the placement. Black goes with the left fighting fox, white goes with the right fighting fox, and the fox emblem goes in front of the palanquin. If the order is reversed, the mural will let you place them but will not progress.
- The Tsuneki trophy does not trigger. You missed at least one note. Doctor’s Record and any three of the four remaining notes is enough. The chapter is designed with a margin of one extra pickup.
Why the chapter teaches reading before fighting
The Dark Shrine is one of the more interesting chapter designs in Silent Hill f because it is built around a learning loop rather than a difficulty curve. The mural at the start does not give you a literal instruction, it gives you an aesthetic and a vocabulary. Every subsequent room asks you to recognize a fragment of that vocabulary: a fox’s eyes, a wall’s stain, a hanging’s color, a bird on a crate. The puzzle is the chapter’s way of training a player to read a horror environment the way a designer reads a level blockout.
That is also why the chapter’s design reads more like a production-minded layout than a sequence of jump scares. There is a clear transit layer, a clear pickup layer, and a clear input layer, and the three layers are wired so that one cannot be skipped without breaking the others. The fox statues teach the transit layer. The notes and crests teach the pickup layer. The final mural teaches the input layer. Solving the Silent Hill f mural puzzle is really the moment the chapter has been preparing you for since the save shrine.
Players who enjoy this kind of layout tend to enjoy it most when they trust the sequence: read the room, take the pickup, follow the stat, place the crest. The reward is not just a chapter completion, it is fluency in a small, dark, and surprisingly coherent folklore system.
Verification notes for a first run
Because the chapter includes several rooms that can soft-lock if a stat is missed, it is worth running the following verification list before you place the final emblems.
- Confirm you have three ornate scrolls in the menu. Two are not enough for the chapter’s intended sequence, and a missing scroll usually means a side chamber was skipped.
- Confirm you have three crests. The Black Sparrow and White Sparrow come from boxes, and the third crest comes from the final combat encounter. If you only have two, return to the cleared fox statue chamber and finish the fight.
- Confirm Focus Power is charged. The final mural accepts the emblems without Focus Power, but any door after the mural will require it.
- Confirm the Tsuneki notes. You need four, and the chapter provides five, so a single miss is recoverable but two misses will block the trophy.
Frequently asked questions
Where is the first fox statue in the Silent Hill f mural puzzle?
The first fox statue is in the back left of the statue chamber you reach through the left door from the mural hall. Inspect it, pull the shard, and the stat rotates to indicate the next door. The same chamber contains the Doctor’s Record note on its central altar.
How do I open the bloody walls in the Dark Shrine?
Bloody walls respond to Focus Power. Walk up to the stained section, trigger Focus Power when the meter is charged, and the wall will animate into a passage. The chapter expects you to use Focus Power at least three times: once near the corridor altar, once in the back of the mural chamber, and once after the Drum Monster fight.
Which door is the correct one in the four-column room?
The correct door is the one flanked by a red hanging on the left and a green one on the right. The other three doors all drop you into a torture chamber with two enemies that you have to clear before you can retreat. After the Drum Monster fight, the Focus Power prompt will open the next set of hidden doors.
What is the mural riddle solution in Silent Hill f?
Place the white bird with the right fighting fox and the black bird with the left fighting fox on the right side of the mural. Place the fox emblem in front of the palanquin on the left side. With all three crests seated, the mural progresses and the chapter’s exit opens.
Do I need every note for the Tsuneki trophy?
You need four notes for the “Truth About the Tsuneki Family” trophy, and the chapter places five pickups. Doctor’s Record, Maid’s Note (first), Maid’s Note (second), and either copy of Letter from a Strict Mother will complete the trophy. The extra note is a margin of safety for players who miss a pickup on a first run.
What is the Omamori Hunting Dog used for?
The Hunting Dog is a charm found in the first side chamber of the corridor. It is a defensive Omamori that affects your combat options rather than the puzzle path. It is optional for solving the mural but useful if you find the Drum Monster and torture chamber encounters demanding.
Why does the third crest box refuse to open?
The third crest box is gated by a combat clear. If the room still has enemies, including a second wave that can spawn after you remove the first shard, the box stays locked. Clear the room fully, wait for the cutscene, and the box will open on the next interaction.
Can I solve the mural puzzle without all three crests?
No. The mural requires all three crests to accept the placement, and each crest is gated by its own pickup. If the mural does not react, the most common cause is a missing third crest, not a wrong placement.
Is there a map for the Dark Shrine chapter?
No. The chapter explicitly tells you there is no map, and the game expects you to navigate by landmarks: the mural, the fox statues, the four-column room, and the altars. The layout is linear, so backtracking is short even without a map.
What unlocks after the Silent Hill f mural puzzle?
Placing all three emblems opens the final door of the chapter, triggers the resolution cutscene, and credits the Dark Shrine sequence. The Tsuneki trophy unlocks as soon as the game confirms you have read the required notes, which usually happens during the chapter’s final room.





Leave a Reply