
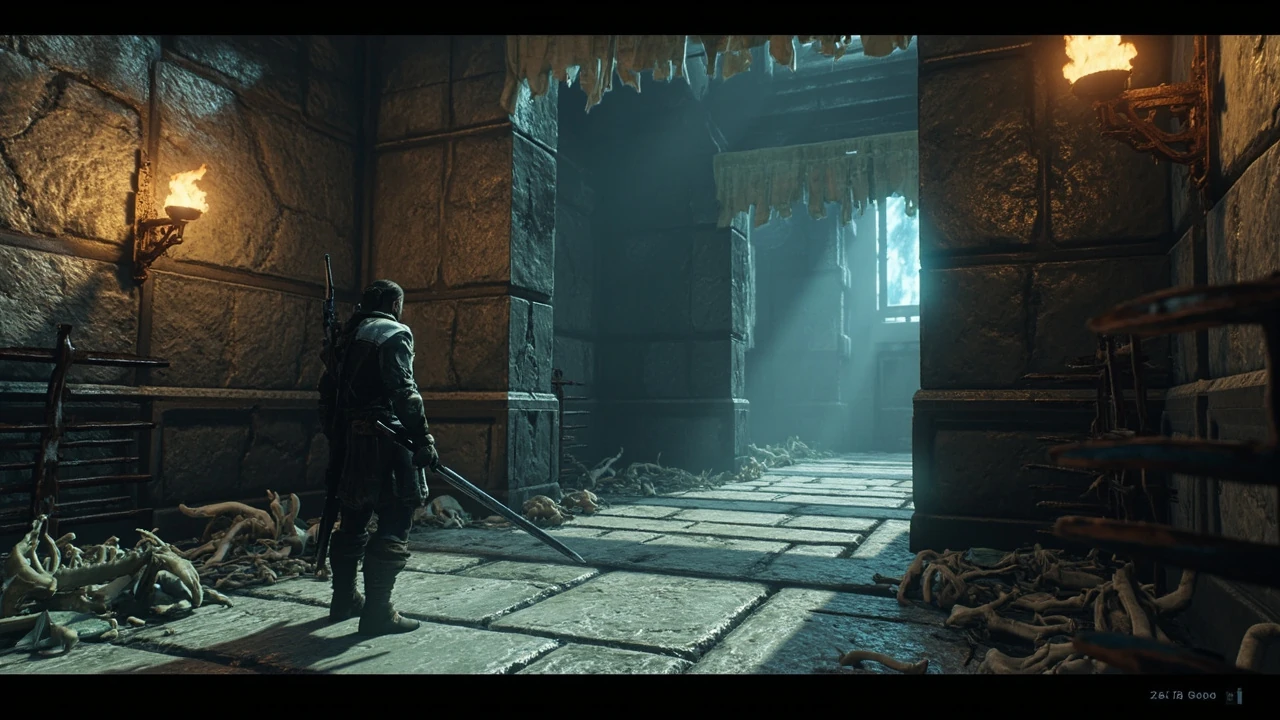
BotW Trial of the Sword: design and difficulty breakdown
The Trial of the Sword is a piece of downloadable content for The Legend of Zelda: Breath of the Wild that strips the player of their inventory and asks them to clear 45 combat rooms using whatever the environment hands them. For most players it is a brutal endurance test. For a designer, technical lead, or combat systems producer it is also one of the cleanest case studies in modern action-adventure design: a self-contained difficulty curve, a tight resource economy, and a progression system taught entirely through encounters rather than dialogue. This article walks through the trial as a production artifact, covering the room structure, the design decisions behind its pacing, the resource logic that holds the chain together, and the lessons a small team can borrow when scoping its own combat content.
The text is organized so a developer can read it as a structured analysis, while a player who is stuck on a particular floor can also jump to the section that covers it. The analysis treats the trial the same way a combat producer would treat an internal vertical slice: by mapping templates, identifying the dials that move difficulty, and asking which decisions would have been expensive to change after the content was locked. The reference points are drawn from the base game as well as from the public design commentary the studio has published over the years, so the conclusions stay grounded in the same studio’s own framing of combat rooms and sword-and-sorcery pacing.
What the Trial of the Sword actually is in the build
The Trial of the Sword ships as part of The Master Trials DLC pack. It unlocks after the player downloads the DLC and speaks to the character in the Korok Forest who offers the challenge. Mechanically, the trial does three things at the same time, and a developer should read each as a deliberate subsystem rather than a feature.
- It removes Link’s existing inventory, including weapons, bows, shields, armor, and food, and refuses to let the player leave to restock.
- It divides the challenge into three multi-floor “beginnings,” each containing 15 rooms that must be cleared in order, with autosave and resume between rooms.
- It grants a permanent combat bonus, the “Master Sword’s awakened power,” once all 45 rooms are complete.
That last point is the one that changes how the encounter chain is tuned. The trial is not a side activity; it is a gating mechanism that turns a narrative item into a long-term progression reward. The DLC’s value proposition is the awakened power, and the trial is the cost. The combat design is therefore tuned not just to be fun in isolation, but to be tolerable in 45-room sessions that may be split across multiple sittings, and that has a measurable effect on how aggressive any individual room can be.
For a producer, the practical reading is that this is a self-contained progression ladder attached to a single item. The team gets to design a chain of 45 rooms, and the player gets a permanent power-up at the end. That is a much cleaner contract than asking the player to grind the open world for the same reward, and it is also a contract that is testable end-to-end without the open world running at full scale.
How the three “beginnings” shape the difficulty curve
The trial is presented as a sequence of 15-room “beginnings.” Each one is a chapter with a distinct combat identity, and together they form a classic ramp curve: introduce, escalate, then convert skill into reward. A production view of that curve is useful because it mirrors the way many action games build their encounter arcs, and it gives a small team a clean template for its own gauntlet content.
| Beginning | Floor count | Combat focus | Resource posture | Player takeaway |
|---|---|---|---|---|
| First Beginning | Rooms 1-15 | Enemy basics: bokoblins, moblins, early chuchus | Weapon racks dominate, food scarce, no elemental threats | Learn to manage weapon durability and basic timing |
| Second Beginning | Rooms 16-30 | Mid-tier threats: lizalfos, electric chuchus, archers | Environmental hazards introduced, limited ranged options | Build spatial awareness, target prioritization, and dodge discipline |
| Third Beginning | Rooms 31-45 | High-threat mix: Moblin HP tanks, Wizzrobes, guardians in later floors | Forced weapon swaps, no safety items, durability pressure is constant | Convert accumulated skill into the awakened Master Sword upgrade |
Notice that the resource posture is part of the design, not a side effect. The trial intentionally hands players weapons with a known low durability so that even successful encounters cost the player something. That is the same logic used in survival-action titles where the player has to make economic decisions mid-fight, and it is a useful reference point for any team building a combat-heavy vertical slice where the encounter has to be solvable on the resources the room itself provides.
The chapter structure also gives the team a way to schedule QA. A regression in the First Beginning tends to be a teaching problem (a verb the player does not know yet). A regression in the Third Beginning tends to be a balance problem (an enemy mix that demands more than the offered weapons can deliver). Splitting the chain into three chapters means those two failure modes do not have to be debugged with the same toolset.
Room structure: a repeatable encounter template
Each room in the trial follows a consistent template. Understanding that template is the most useful thing a designer can take from the experience, because it is one of the cleanest examples of “atomic encounter design” in a modern open-world title. The template is short on purpose, and the chain works because the template is the same in room 1 and in room 45.
- Player enters a rectangular chamber with a closed exit gate on the far end and at least one weapon rack or environmental weapon visible from the doorway.
- Enemies are already present, or spawn from the floor as Link crosses a threshold near the center of the room.
- Defeating every enemy or interacting with a switch opens the exit, but only after a short confirmation delay so the player can read the reward state.
- A weapon rack, environmental weapon, or food pickup appears as a reward for clearing the room, and the player carries it into the next room.
That four-step template is what lets the player build a mental model of the trial. By the second or third room, the player knows the gate will not open until combat ends, and they know to scan the room for a reward before they engage. The same idea shows up in roguelike rooms and procedural dungeon crawlers, where repeated templates with varied content produce a sense of mastery rather than a sense of repetition.
For developers, the lesson is that a long combat chain feels coherent when the macro rules (gate, reward, durability cost) are stable, and only the micro content (enemy types, weapon spawns, terrain) varies. Change the macro rules and players lose the sense of progress; change only the micro content and the design becomes predictable. The trial walks that line by keeping the geometry and the gate logic identical across all 45 rooms and pushing all variation into the enemy mix and the reward rack.
A secondary lesson is in the delay between the last enemy dying and the gate opening. That delay is short, but it is a real design choice. It gives the player a beat to breathe, to scan the reward, and to decide whether to keep a low-durability weapon or drop it. Removing that delay would not break the chain, but it would remove a small moment of player agency that the rest of the design depends on. For broader context on The Legend of Zelda, the Legend of Zelda provides a concise reference for this section.
Enemy composition as a difficulty dial
If the rooms are the template, the enemy composition is the dial. The Trial of the Sword uses four knobs to control difficulty: enemy count, enemy tier, ranged versus melee mix, and environmental hazard. A useful way to study the trial is to look at how those knobs are turned up and down across the 45 rooms, and which combinations produce the rooms that players remember.
| Difficulty knob | Where it is used | Effect on the encounter |
|---|---|---|
| Enemy count | Spikes in mid-Second Beginning and late-Third Beginning | Forces the player to use area-of-effect weapons and crowd control instead of single-target swings |
| Enemy tier | Escalates gradually from red bokoblins to Moblin HP tanks and Wizzrobes | Raises the per-enemy time and damage cost, and changes which weapons are worth spending |
| Ranged vs. melee mix | Archers introduced in Second Beginning, expanded in the late Second and Third Beginnings | Forces the player to break line of sight, use shields, or close distance instead of trading hits |
| Environmental hazard | Water, fire, electricity, and metal weapons on specific floors | Compounds the resource cost by forcing the player to swap or drop gear to avoid the secondary effect |
The most interesting design decisions sit at the intersections of those knobs. A room with a single Moblin HP tank is a slow attrition fight; a room with several Moblin HP tanks and a few archers is a positional puzzle. The same is true in any combat-heavy production: a single high-HP enemy is rarely a difficulty spike, but mixing that enemy with a ranged support changes the encounter from a stamina test to a positioning test, and the player’s skill requirements change with it. The trial leans on those intersections, and the rooms that players consistently remember are the ones where two or more knobs are turned up at the same time.
A useful internal exercise is to take any room from the chain and ask which knob is doing the work. If a room feels hard only because of enemy count, the design is doing the wrong job; the player is grinding rather than solving. If a room feels hard because of an environmental hazard plus a ranged mix, the design is asking the player to make a real decision, and that is the kind of room the chain is built around.
The hidden resource economy
Although the trial is framed as a combat challenge, it is also a tight resource economy. Weapons, arrows, and food are all bounded, and the player cannot refill the way they can in the open world. That is what makes the trial feel different from the base game’s combat shrines, where the player can usually over-prepare before walking in. The economy has four moving parts, and a designer should think of each as a separate dial.
- Durability is the primary currency. A weapon used in one room is often near-breaking by the next, so players learn to spend low-tier weapons first and save high-tier weapons for tougher rooms.
- Food and healing are deliberately limited. Most rooms do not heal the player, so every mistake has a visible cost, and a forced restart is always on the table.
- Arrows are rationed. Bows and arrows in the trial are rare enough that players learn to use them only on enemies that are unreachable by melee, or to interrupt Wizzrobe teleports.
- Environmental weapons matter. The trial seeds bombs, magnesis objects, and elemental weapons so that the player can solve some rooms with terrain rather than inventory, and the rooms that do not offer that option are tuned to be solvable with the offered melee weapons.
That economy is what turns the trial into a skill test rather than a stat test. A player who can read the resource state of the room before engaging can clear floors that feel impossible to a player who charges in and burns their strongest weapon on the first bokoblin. The same dynamic is what makes survival-action titles memorable: the encounter is solvable, but the resources to solve it are not free, and the design has to be honest about both halves of that contract.
For a producer, the resource economy is also the part of the chain that is easiest to break in a patch. A small change to weapon durability, food drop rates, or arrow counts can quietly invalidate several rooms, and the QA cost of revalidating all 45 rooms after such a change is non-trivial. That is one of the reasons the trial is balanced around a small number of weapon types and a narrow set of pickups: it keeps the surface area of the economy small enough to test.
How the trial teaches combat fundamentals
One of the more interesting aspects of the Trial of the Sword is that it is structured as a tutorial you can fail. The first few rooms introduce the core verbs of the combat system at a slow pace, then start requiring those verbs to chain together. From a level-design perspective, the teaching path looks like this, and a combat lead can map the same structure onto almost any action title.
- Rooms 1-5: learn to read the room, find the reward rack, and use a basic weapon until it breaks.
- Rooms 6-10: introduce dodging, perfect-guard timing, and the difference between a weapon’s swing speed and damage.
- Rooms 11-15: introduce the concept of switching weapons mid-fight instead of finishing one to durability zero.
- Rooms 16-20: introduce elemental enemies, electric chuchus, and the player’s first ranged threat.
- Rooms 21-30: introduce positioning, terrain use, and the cost of standing still under archer fire.
- Rooms 31-45: require the player to chain all of the above without a safety net, and add guardian-tier enemies to the mix.
That ladder is exactly the kind of skill ramp that a producer would build into a vertical slice for combat. Each tier adds one new verb and one new constraint, so failure modes are diagnosable: a player stuck on room 22 is usually losing fights to the new verb (ranged threats) rather than to a sudden difficulty spike. A useful exercise for any combat design team is to take their own encounter chain and ask whether each step adds a single new verb or stacks several at once. Stacking tends to produce rage-quit spikes; laddered verbs produce steady progression, and the player is more likely to blame themselves rather than the game, which is the design outcome the trial is after.
The teaching ladder also explains why the trial is forgiving on the first few rooms in a way that surprises players. Those rooms are not really about combat; they are about getting the player to internalize the template. By the time the chain actually demands skill, the player has already accepted the rules, and the design can push harder without losing the audience.
Where the design gets difficult to ship
It is worth naming the production cost of a chain like the Trial of the Sword. The DLC adds 45 distinct combat rooms to a game that already has dozens of enemy types, and each room has to be balanced against the next. The costs show up in a few places, and a producer who is scoping a similar piece of content should expect to budget for all of them rather than treating the encounter chain as a side task. Readers reviewing iwata asks can use the iwata asks for additional context on this point.
- Encounter scripting: each room’s enemy placement, spawn logic, and exit gate are individually authored and tested, which is hours of designer and QA time per room.
- Balance pass: because the player carries weapons between rooms, a balance change in room 10 can cascade into rooms 25 and 40. That is a regression-test cost on a large set of configurations.
- QA coverage: testers must clear the trial with multiple weapon loadouts, armor sets, and play styles to expose soft-locks where a room is impossible with the offered resources.
- Live operations: after release, patches that change enemy stats or weapon durability can break the trial, and the team has to revalidate every room rather than just the open world.
That is one of the reasons a focused, self-contained combat chain is more often shipped as DLC or a gauntlet mode than as a core campaign: the QA and balance cost of a 45-room encounter chain is significant, and a single change can invalidate a large amount of design work. Studios that scope large open-world combat systems often break those systems into smaller, separately shippable chunks for exactly this reason, and the trial is a clean example of that pattern in production.
A related cost is the scripting surface for save and resume. Because the trial autosaves between rooms and lets the player quit and return, every state transition has to be tested. A room that is solvable on a fresh run can become unsolvable on a resumed run if a flag is set incorrectly, and those bugs are the kind that only show up in long play sessions. The DLC handles this by keeping the state surface narrow, but the cost is still real.
Common failure modes for developers building similar content
If you are using the trial as a reference for your own combat content, the most common mistakes are easy to predict because the trial itself avoids them. Watch out for the following traps, and treat each one as a checklist item before you lock your own encounter chain.
- Spiking too early. Putting a high-HP enemy in the second or third room collapses the teaching ladder and makes the early rooms feel unfair, which kills retention before the player has learned the template.
- Removing the reward loop. The trial always offers a reward rack or environmental weapon after each room. Without that, the player loses the sense of progress and the run feels like punishment, and the chain will be cited as the reason the DLC is “grindy.”
- Stacking ranged and melee. A room with a single archer and a single melee enemy forces the player to choose between threats, which is interesting. A room with three archers and three melee enemies usually turns into a strafing tax rather than a tactical choice, and the room becomes tedious rather than hard.
- Forgetting durability. The trial’s core tension is weapon durability, and any similar mode needs to respect that the player will run out of strong options if they spend carelessly. A mode that hands the player infinite durability removes the resource decision and reduces the encounter to a stat check.
- Hard-pacing failures. Some rooms of the trial are universally cited as walls (the water-floor rooms and the late-Third Beginning guardian rooms are good examples). If your own design has a single room that blocks a large share of players, that is a balance bug, not a feature, and the right fix is usually a small enemy or weapon tweak, not a full room redesign.
The trial is also instructive in what it does not do. It does not add a new player ability mid-chain, it does not change the camera, and it does not introduce a boss with a unique attack pattern. The complexity is in the mix, not the rule set, and that is what keeps the QA cost manageable. A team that is tempted to add a new verb at room 30 should expect to retest the entire chain from the start, because new verbs interact with old ones in ways that are hard to predict without running the chain end to end.
Reading the trial as a combat-DLC shipping pattern
Beyond the level design, the Trial of the Sword is a useful example of how a large, polished combat DLC is scoped. Three patterns show up that are worth borrowing, and a producer can use the same three-column check to plan a similar piece of content for a different game.
| Pattern | What the trial does | Why it works |
|---|---|---|
| Self-contained scope | No new regions, no new story beats, no new traversal mechanics | Lets the team focus budget on combat tuning and reward rather than worldbuilding |
| Stacked reward | Each cleared beginning feels like a milestone, the awakened Master Sword is the final reward | Keeps engagement high across long sessions and gives the player a reason to restart on failure |
| Reusable templates | Room geometry, gate logic, and reward rack placement are shared across all 45 rooms | Reduces asset cost and design time per room, and keeps the player oriented |
For a studio that is planning its own combat DLC, the key takeaway is that the value is concentrated in the reward and the tuning, not in the number of unique rooms. A team can ship a 20-room gauntlet that feels as meaningful as a 45-room one if the reward is right and the difficulty curve is honest. The 45-room count is a marketing number as much as a design number, and a smaller chain with a tighter budget is a legitimate option for a studio that cannot afford the full QA pass.
Player-side checklist for clearing the trial
Even with a developer focus, it is useful to close with a short player-side checklist. These are the same rules a designer would want the player to learn, expressed as practical steps, and a developer can use the same list as a design test: if a step on the list is not actually required to clear the trial, the design is wasting the player’s attention.
- Pick up every weapon in the starting room before moving on; the trial does not backtrack, and the starting rack is the only guaranteed pickup in the chain.
- Use the lowest-durability weapon first and save high-damage weapons for Moblin HP tanks and Wizzrobes, because those enemies absorb more hits per second than the early bokoblins.
- Always check the back of the room and the corners; a hidden weapon rack is often the only thing standing between a clean clear and a forced restart, especially in the Second Beginning.
- For Wizzrobe rooms, prioritize the Wizzrobe first and use arrows or a fast weapon to interrupt teleports, since a teleporting Wizzrobe will drain durability faster than any other enemy in the chain.
- For water rooms, treat the floor as a hazard and use Cryonis orbs and elevated terrain rather than standing in the water, because electric chuchus in particular will close the distance quickly.
- For guardian rooms, save at least one strong two-handed weapon and keep a shield ready for the laser return, since the guardian’s beam is the only attack in the trial that can one-shot a full-health Link.
- Do not waste food. Healing in the trial is rare, and a top-off after every fight will run out long before room 45, leaving the player without a safety net for the hardest rooms.
If you are using the trial as a reference for your own combat design, run the checklist mentally as you clear each room. The fact that the list is short and reasonable is itself a signal that the trial is teaching well, and a similar mode that requires a longer mental checklist is usually a sign that the template is doing too much work.
External context and the wider design conversation
The Trial of the Sword sits inside a long tradition of focused combat challenges in the Legend of Zelda series, and the design of the rooms echoes the same room-by-room teaching structure that the broader franchise has used since the original game on the NES. The wider franchise history is a useful reference here: the series has long used short, self-contained rooms to introduce verbs one at a time rather than through explicit tutorial text, and the trial is a modern restatement of that approach with the Breath of the Wild combat kit. For background on the series and how the room-by-room teaching pattern fits into its evolution, the franchise overview on Wikipedia is a reasonable starting point.
For a more specific read on how the studio frames combat encounters as part of a larger sword-and-sorcery world, the Iwata Asks interview about the sword-and-sorcery framing of the series explains the design team’s intent at a high level. It is a useful counterweight to the room-level analysis above, because it shows how the same studio talks about combat when the audience is players rather than designers, and it makes clear which parts of the room design are inherited from the franchise and which parts are specific to the Breath of the Wild combat kit.
Putting the two together is what makes the trial a useful reference: the room-level analysis tells you what the chain does, the franchise context tells you which decisions are deliberately conservative and which are new, and the interview gives you the language the studio uses internally to describe both. A small team that is scoping a similar piece of content can use the same three sources to decide which trade-offs are worth copying and which are specific to a Zelda budget and timeline.
Frequently asked questions
How long does the BotW Trial of the Sword take to clear?
For an experienced Breath of the Wild player, the trial takes between 90 minutes and three hours across a few sittings, depending on how often they restart and how comfortable they are with the late-game enemy types. Newer players should expect longer, because the resource economy and the late-Third Beginning rooms are designed to punish carelessness, and most first-time clears include at least one restart from the last autosave.
Do you keep your weapons between rooms in the BotW Trial of the Sword?
Yes. You keep your weapons, bows, shields, and any food you have picked up between rooms, but the starting inventory is removed and you cannot leave to restock. That is what makes each room a resource decision as well as a combat decision, and it is also why the early racks matter so much: a weapon you skip in room 3 is a weapon you do not have in room 18.
What is the reward for finishing the BotW Trial of the Sword?
The reward is the Master Sword’s awakened power, which permanently boosts the sword’s damage and adds a beam attack when Link is at full health. The awakened power is the entire point of the trial, and it is the reason the difficulty is tuned to feel meaningful rather than optional, since the sword is otherwise limited by its recharge mechanic in the late game.
Can you save and resume the BotW Trial of the Sword?
Yes. The trial autosaves between rooms, and you can leave the challenge, rest at a campfire, and resume at the last cleared room. That resume behaviour is part of why a 45-room chain is reasonable to ship: players do not have to clear it in one sitting, and the studio does not have to design around a single long session.
Which rooms in the BotW Trial of the Sword are the hardest?
For most players, the water-floor rooms in the First and Second Beginnings and the late-Third Beginning rooms with Moblin HP tanks and guardians are the hardest. The water floors are hard because the floor is a hazard and electric chuchus close distance quickly, and the late rooms are hard because the enemy mix punishes the player for standing still. The trial is balanced so that there is no single “wall” room, but those floors are common restart points.
Is the BotW Trial of the Sword good combat-design reference material?
Yes. The trial is one of the cleanest examples of a self-contained combat DLC in a modern action-adventure game. The room template, the resource economy, the enemy composition dial, and the teaching ladder are all useful patterns for any team building focused combat content, and the DLC is short enough that a small team can study the entire encounter chain without weeks of play.
Does the BotW Trial of the Sword change if you play on Master Mode?
The core trial content is the same on Master Mode, but enemy detection, damage output, and tier rates differ. In practice that means a Master Mode run feels harder at every room, and rooms with healers and regenerators in the open world behave similarly in the trial. The awakened power reward is unchanged, and the room templates are the same, so the design lessons transfer directly.
Why does the BotW Trial of the Sword feel harder than the main game?
It feels harder because the open world gives the player a full inventory, food, fairies, and traversal options that are not available in the trial. The trial strips all of that away and asks the player to clear 45 rooms with a bounded resource pool, which is a different game. The combat verbs are the same, but the cost of failure is much higher, and there is no shrine to teleport to and no cooking pot to fall back on.
Should I clear the BotW Trial of the Sword before or after the main story?
For the player experience, clearing it after finishing the main story is usually more satisfying, because the awakened power scales the Master Sword into late-game content and gives the player a reason to keep using the sword in the post-game. For a developer studying the design, it does not matter when you clear it; the encounter chain is the same and the lessons are the same, and most of the rooms are tuned to be solvable with low-tier gear anyway.





Leave a Reply